How to Solve a Rubik’s Cube (Beginner, Step-by-Step)
This beginner’s guide will walk you through how to solve a Rubik’s Cube step by step, even if it’s your first time. You’ll start with basic moves and gradually advance to more complex techniques. Ready to get started? Let’s go!
Need a cube to practice on? See our best cubes for beginners guide (simple picks on Amazon.com plus a longer comparison list).
Basic Rubik’s Cube Solving Method
Learn the basic steps to solving a Rubik’s Cube. First, get familiar with the cube’s structure and practice the fundamental rotation techniques.
Step-by-Step Guide
We have prepared six basic steps for solving a Rubik’s Cube, designed especially for beginners. By following these steps one by one, anyone can successfully solve the cube. Just follow the instructions below and take it step by step!


How to Solve the Bottom Layer

In this section, you’ll learn the steps needed to complete the bottom layer of the Rubik’s Cube. This step is crucial as it forms the foundation for solving the cube.
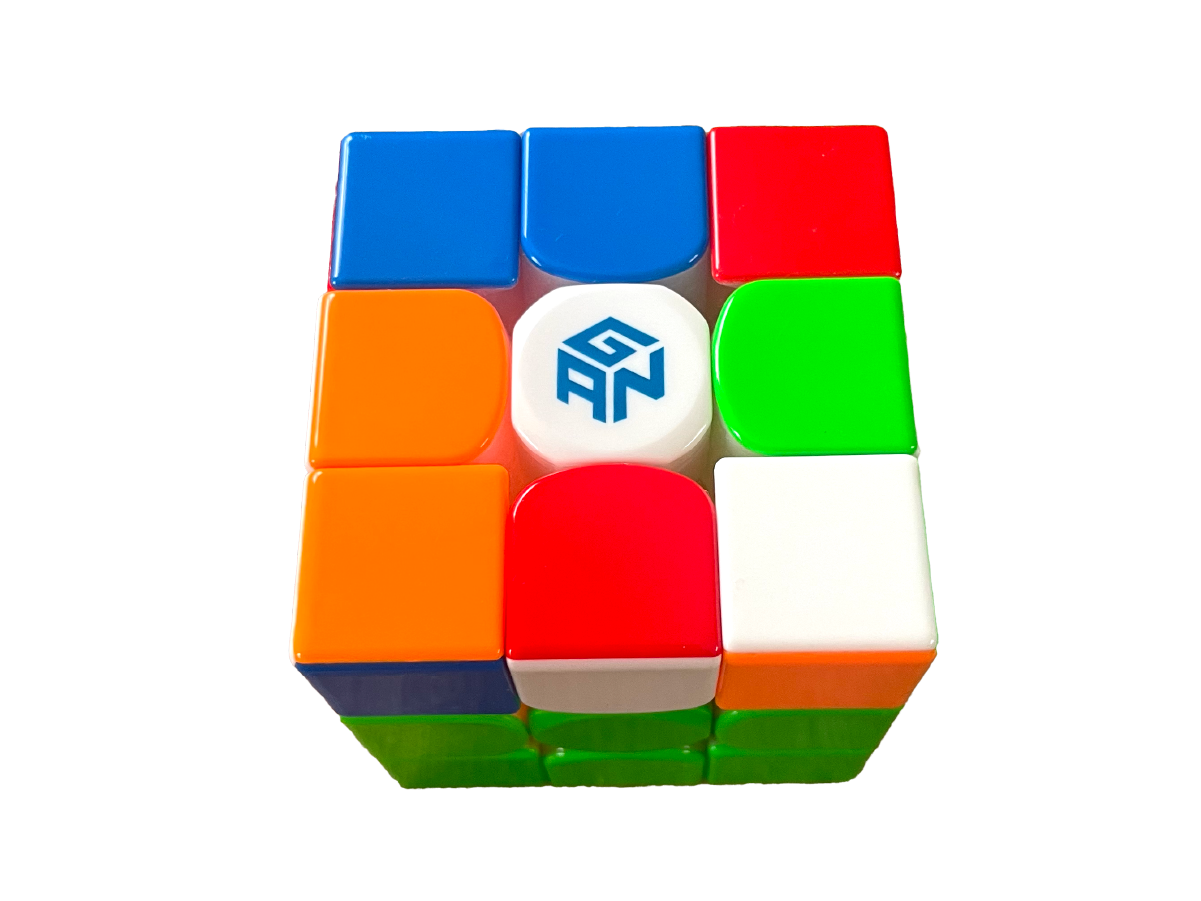
Step 1: Create the Cross

The first step in solving the Rubik’s Cube is creating the cross.
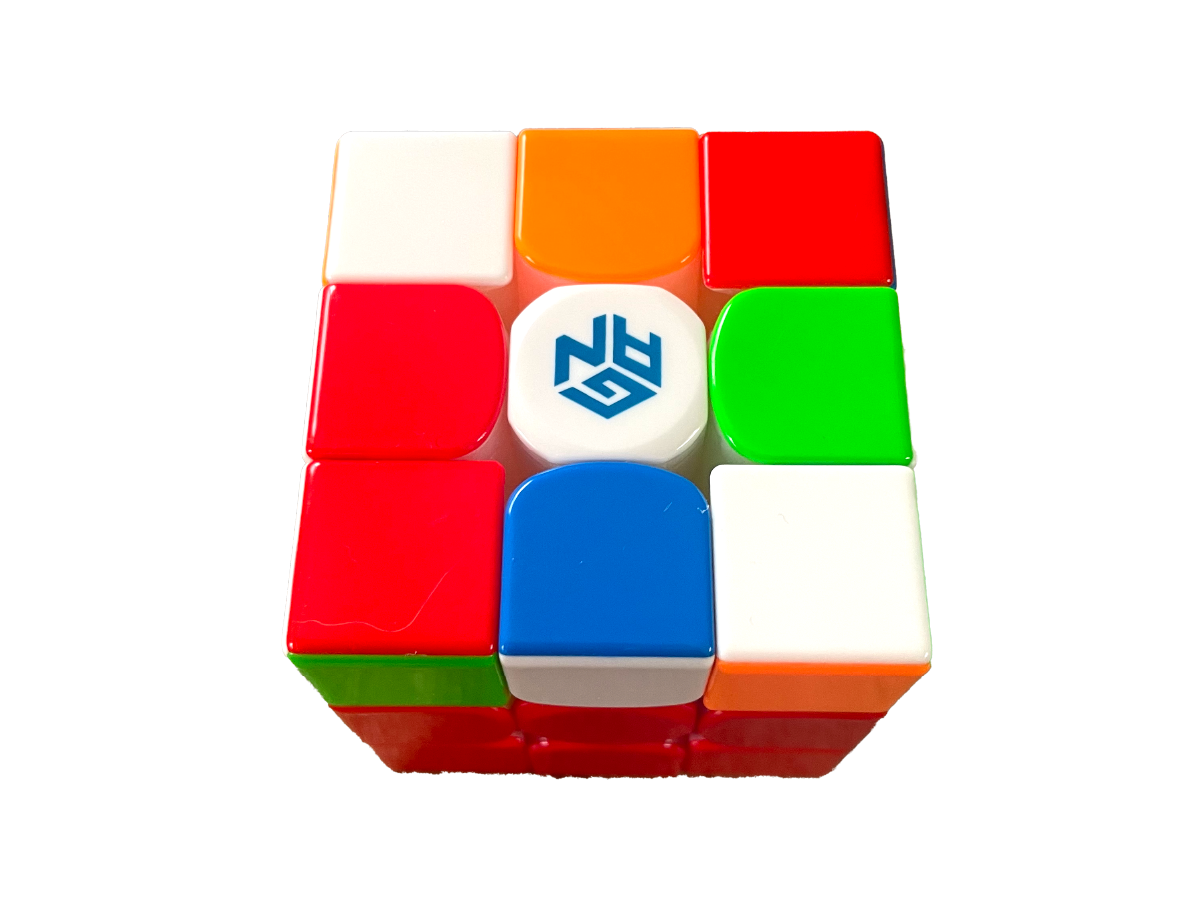
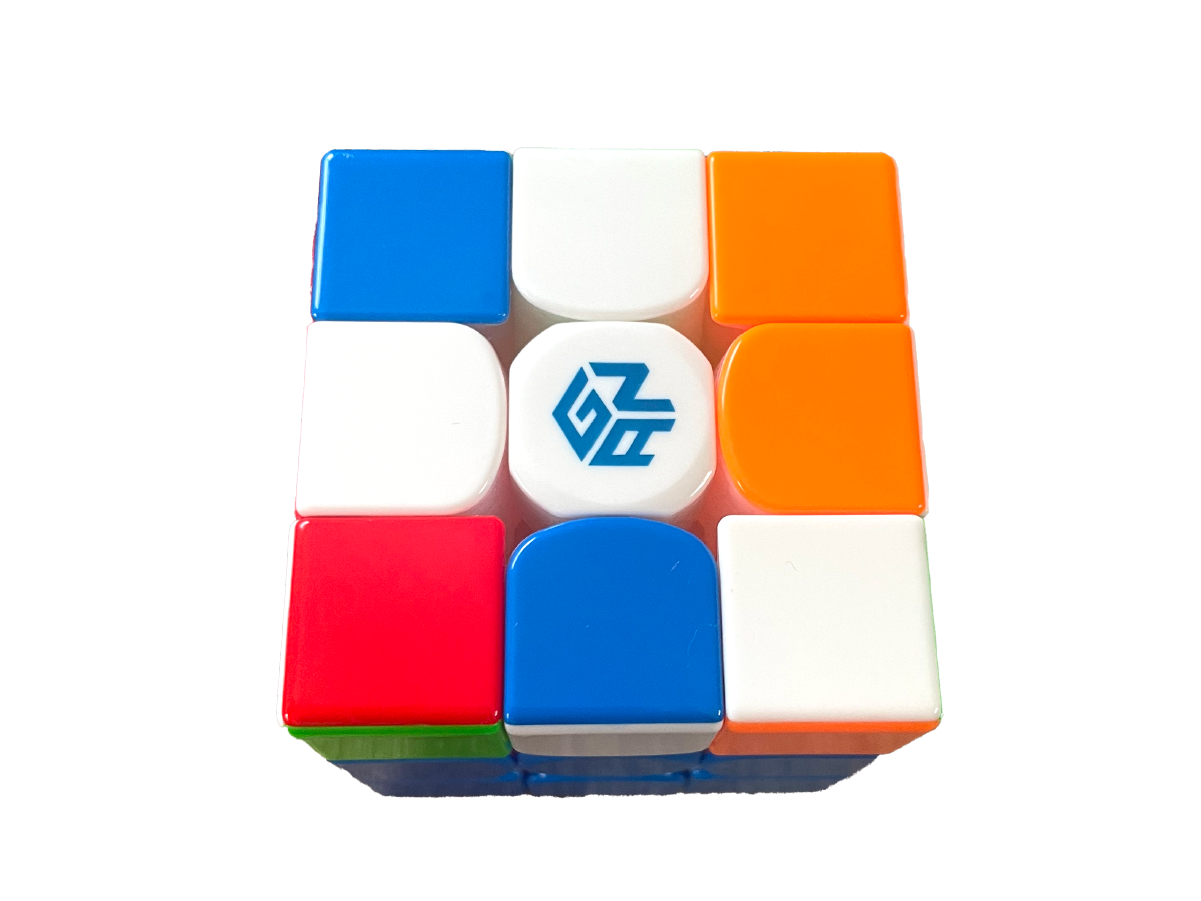
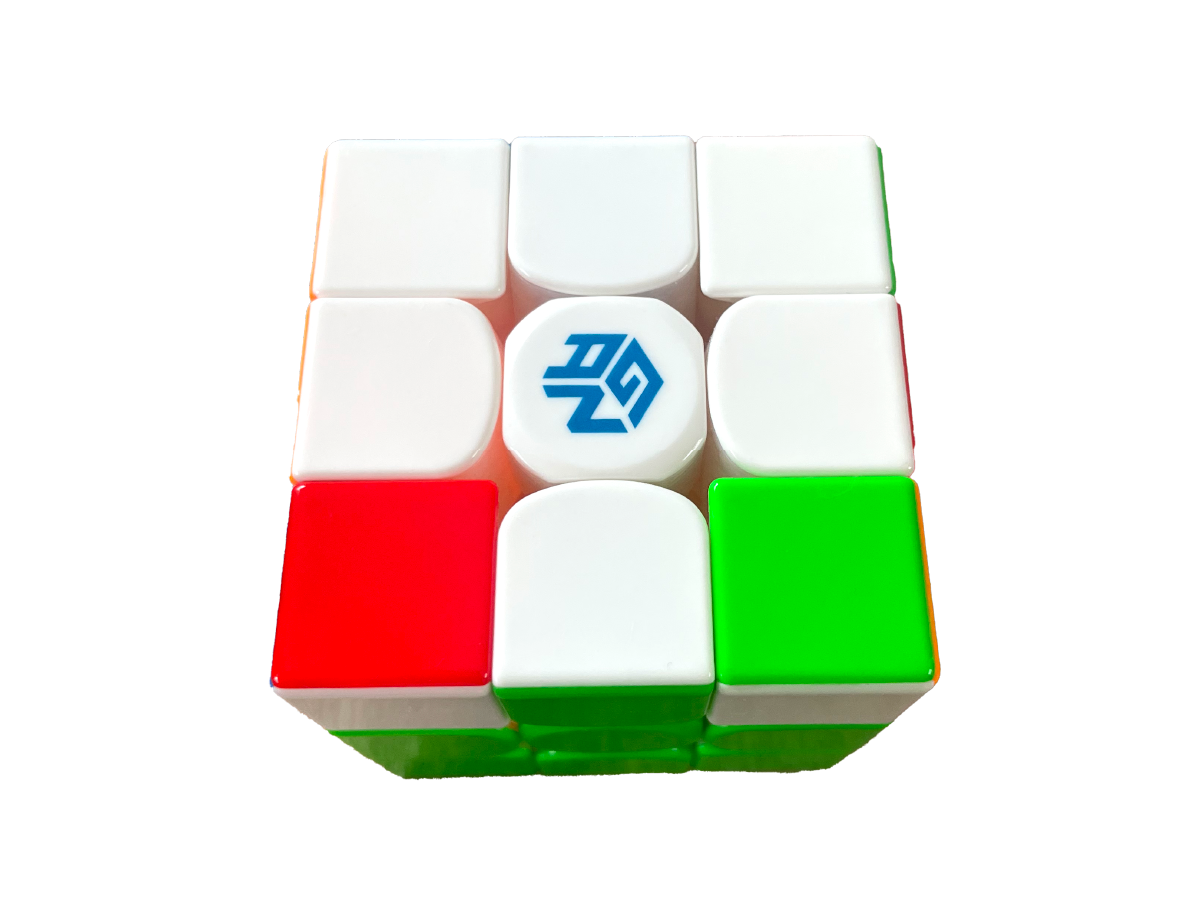
The goal of this step is to make a white cross (keep the yellow face on top, as shown in the diagrams).
Gather Yellow Around White!

To create the yellow cross, first, gather yellow pieces around the white center to form a cross.
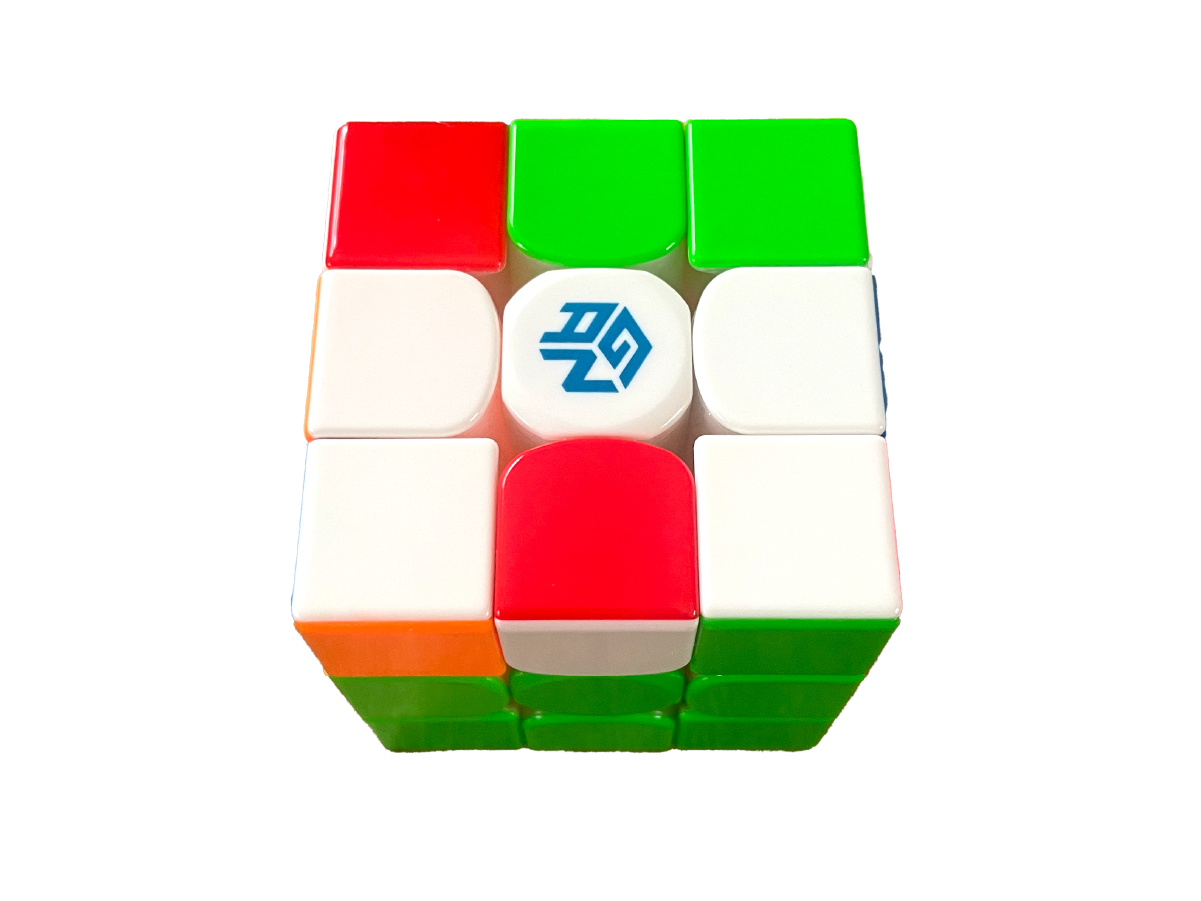
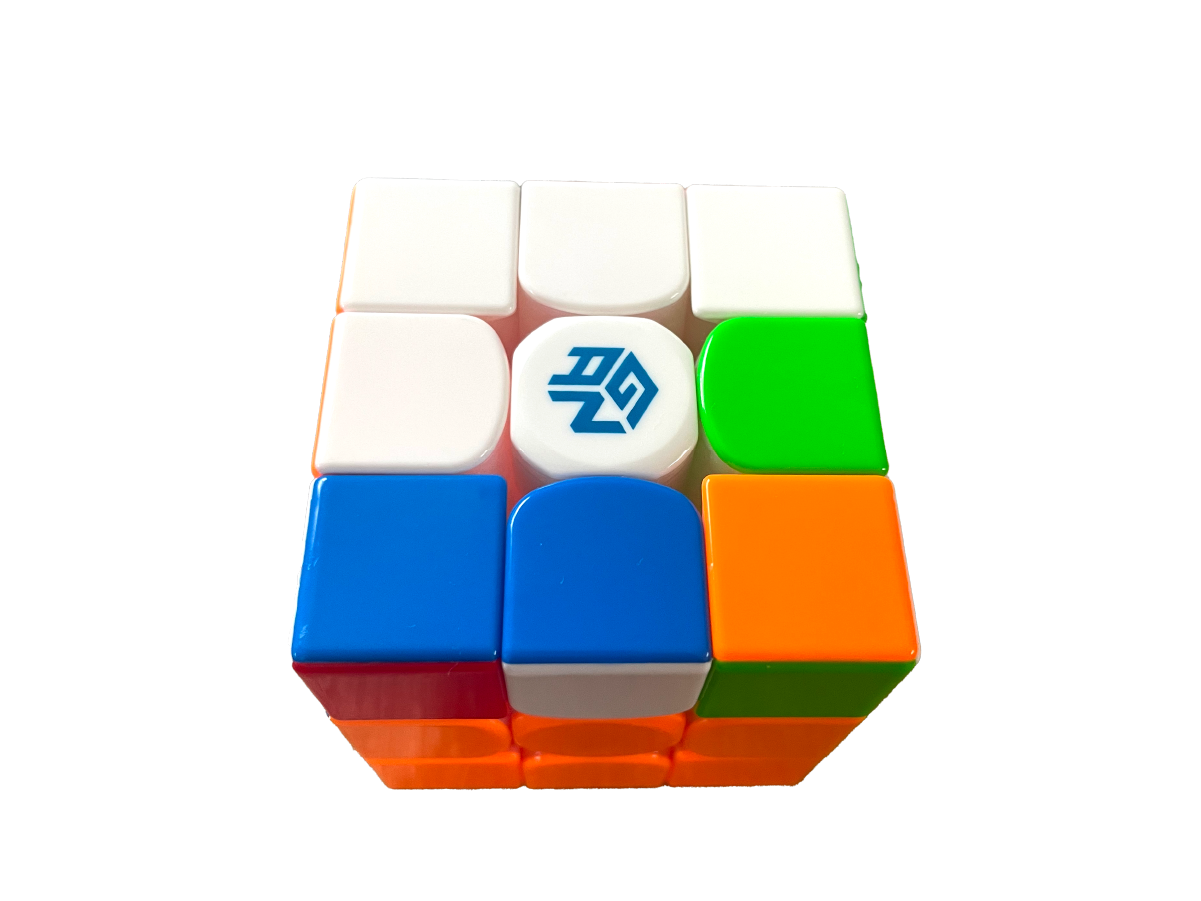
Pattern 1

Pattern 2


Let’s Create the Yellow Cross!

Move the cube to align the middle layer and top layer colors!

Now, flip the aligned pieces over and over with a “flip” and another “flip!”
Once you align one part, follow the same steps to align the other pieces too.
Check it out in the video!
[Step 1] Super Easy Way to Solve the Rubik’s Cube | Creating the Yellow Cross
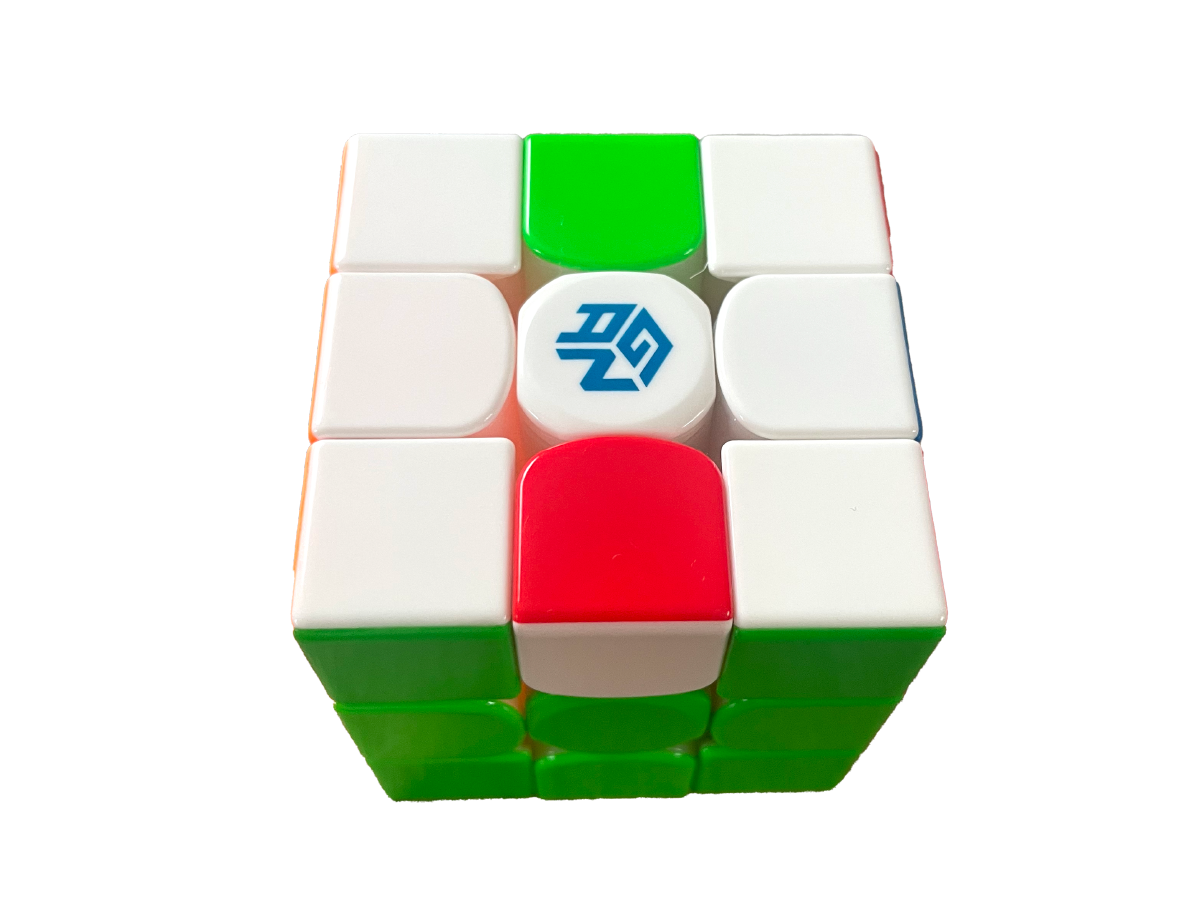
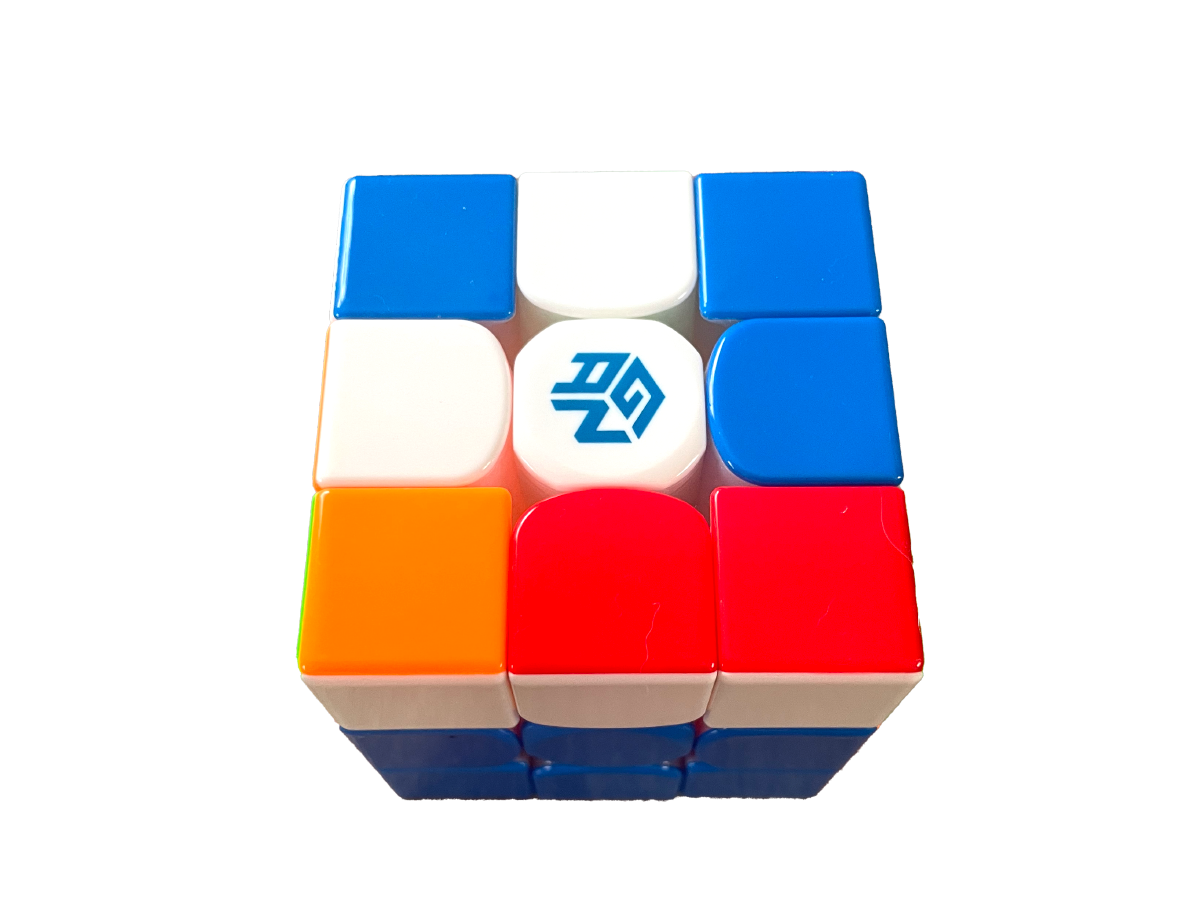
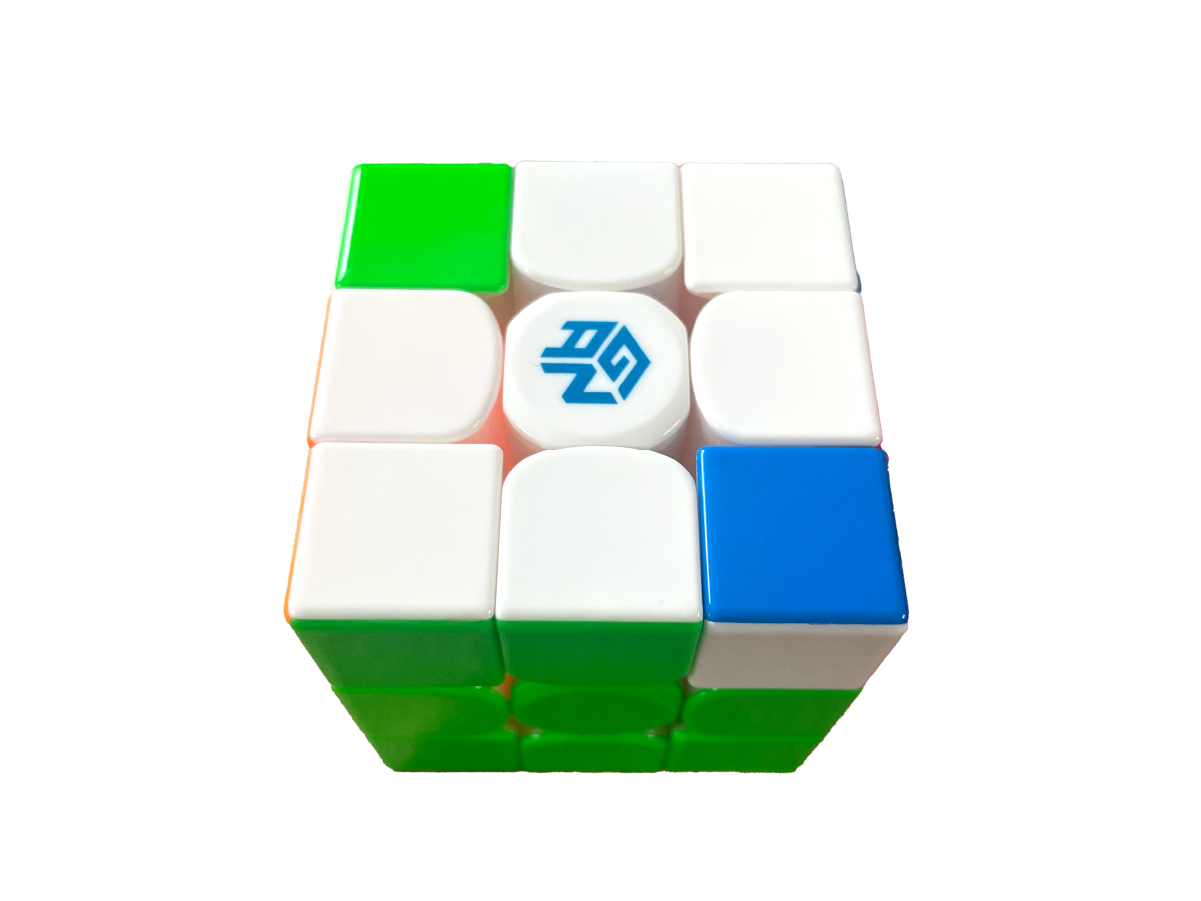
Check
Is your yellow cross complete? Check if the middle layer matches the yellow face, just like in the image above!

Step 2: Complete the Bottom Layer

Next, align the corner pieces into the correct positions.
The goal of this step is to move the corner cubes at the yellow face to their correct positions.
This will complete the bottom layer.
Align the Bottom Right in Sequence
1 With the yellow cross on the bottom, move the cube you want to position in the bottom right to the top right.

2 Keep performing R turns until the cube is in place.
R Turn |  |  |  |
If the cube slips down, just continue the R turn! It will come back up automatically.
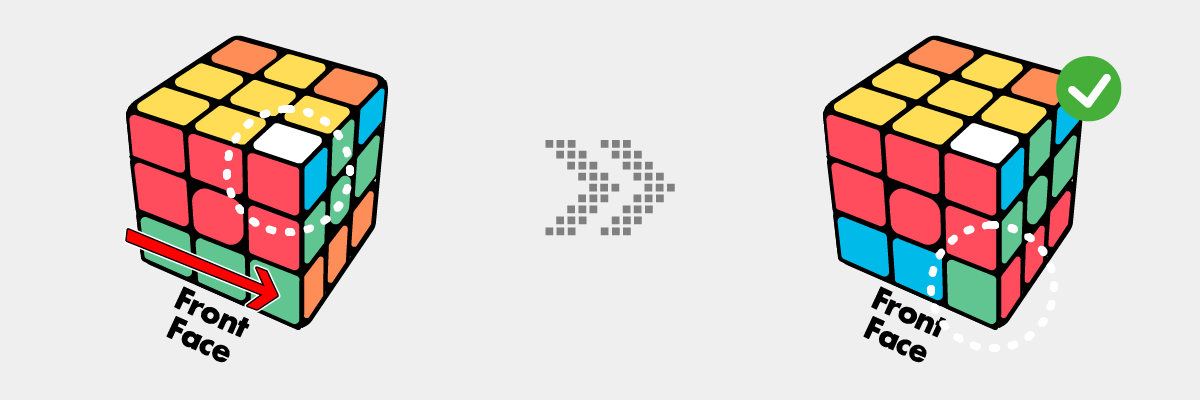
An “R turn” means holding the Rubik’s Cube facing you and rotating the right side clockwise by 90 degrees.
For more details, check the Rubik’s Cube Basic Moves Guide
Let’s solve the remaining corners
3 Use the same method to solve all four corners of the bottom layer.
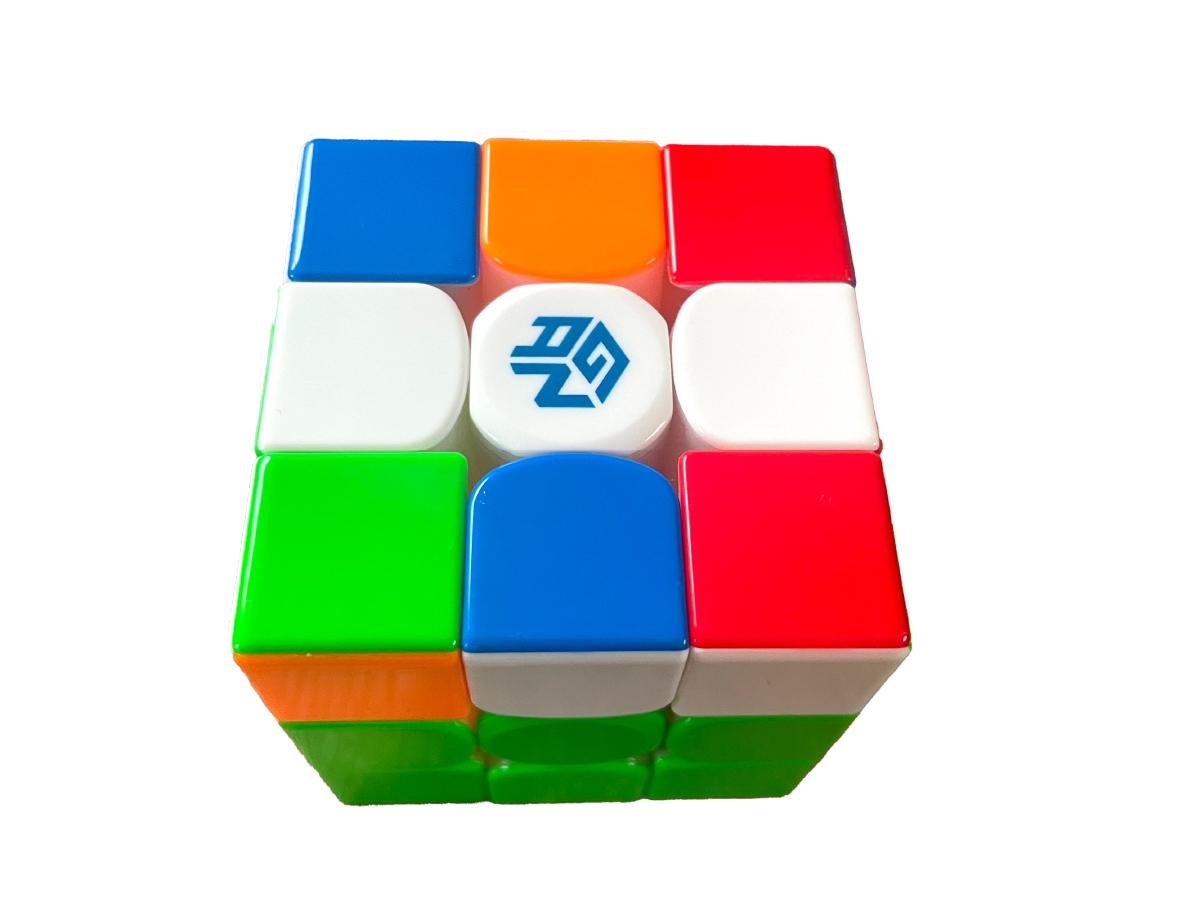
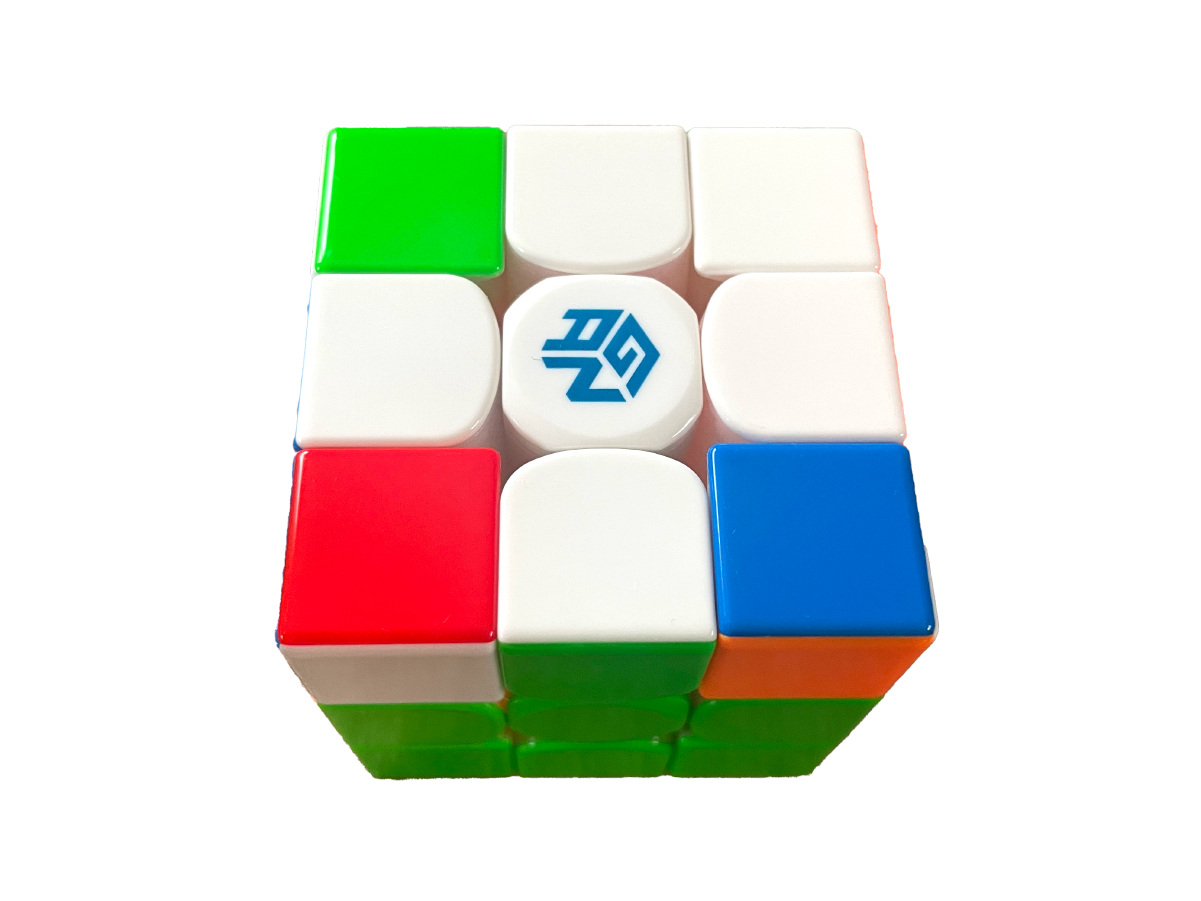
Check! Have you solved all the corners on the bottom layer?
Check it out in the video!
[Step 2] Super Easy Way to Solve the Rubik's Cube | Complete the Bottom Layer
Solving the Middle Layer

In this step, you’ll learn how to solve the middle layer. While keeping the yellow cross intact, we will work on completing the middle layer.
STEP 3: Aligning the Middle Layer

Move the edge pieces of the middle layer into their correct positions. Repeat this process until all edge pieces are correctly placed.
Look for a Cube without a White Face
1 Find a cube that does not have a white face, and move it to the position where it matches the side color.

2 Decide if it needs to go to the right or left.
Check the colors of the cube and decide whether it should be moved to the right or left. Then move the edge piece to the correct position.


1. If Moving to the Right


2. If Moving to the Left

Repeat this process until all edge pieces are in the correct position.
Check it out in the video!
[Step 3] Super Easy Way to Solve the Rubik's Cube | Align the Middle Layer
Check
Are the bottom two layers aligned? You’ve now completed two-thirds of the cube! Let’s move on to STEP 4!
Solving the Top Layer

The final step in solving the Rubik’s Cube is completing the top layer. In this step, you will finish the last layer while keeping the already completed bottom and middle layers intact.
Step 4: Creating a Cross on the Top Layer

To create a white cross on the top layer, you’ll need to follow three steps. First, check the shape of your cube!

There are different shapes to work with: dot, line, L-shape, and full cross. We’ll align them step by step. Although the corners may have white pieces too, you can ignore them for now!
Pattern1 If there’s only a single white piece in the center (Dot pattern).


Oll-01
Oll-03
Oll-17
Pattern2 If you have a single white line across the top (Line pattern).


Oll-33
Oll-34
Oll-57
Oll-51
Pattern3 If the pattern resembles an “L” shape, like 9 o’clock.

Oll-10
Oll-31

Oll-38
Oll-49
Pattern4 If you already have a white “cross” completed.

You got lucky! Move on to Step 5 without any additional work.
Oll-21
Oll-23
Oll-25
Oll-26
Check it out in the video!
[Step 4] Super Easy Way to Solve the Rubik's Cube | Create a Cross on the Top Face
Step 5: Align the Center of the Top Face

Finally, let’s align the top layer. After this step, your Rubik’s Cube will be fully solved! In this step, keep the white cross intact and focus on matching the center colors on the sides.
1 Move the top layer and try to align the center colors on the sides.

Check if the faces are “Opposite” or “Adjacent”
2 Check if the sides are aligned with the middle layer. Determine if the matched faces are “Opposite” or “Adjacent,” and proceed accordingly to the next step.


1. If the faces are matched on opposite sides

Hold the matched face in front of you and follow these steps.
2. If the faces are matched on adjacent sides

Hold the matched faces in front and on the left side, and perform the same moves as in Pattern1.
Check it out in the video!
[Step 5] Super Easy Way to Solve the Rubik's Cube | Align the Center of the Top Face
Check
If the entire cube has the convex shape on all faces, you’re good to go!
Step 6: Solve the Entire Top Layer

Welcome to the final stage of solving the Rubik’s Cube: Step 6. In this step, we will complete the white face on the top layer while keeping the already solved bottom and middle layers intact.
Follow each step carefully. This process is repeated until all pieces are in the correct position and orientation.
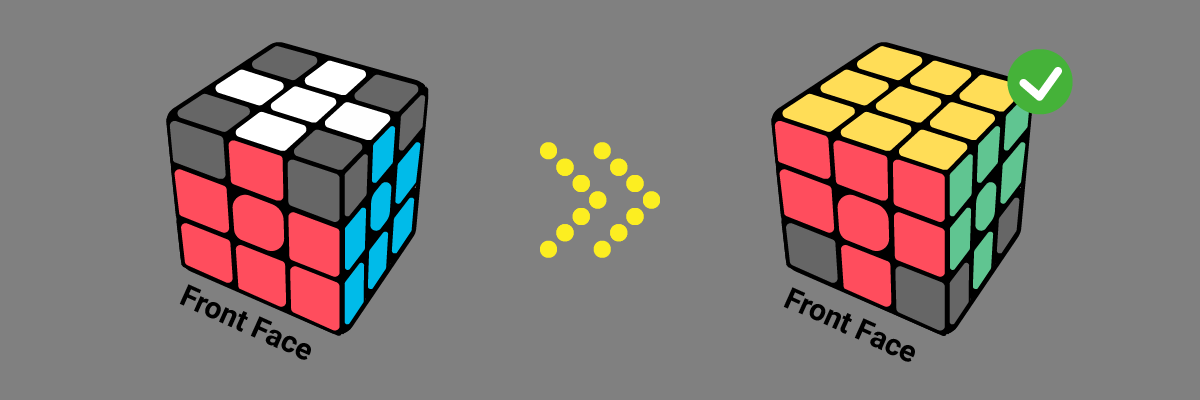
1 Flip the cube over

Flip the cube so that the white cross is on the bottom and the yellow face is on top.
2 Make the bottom face of the bottom layer white.
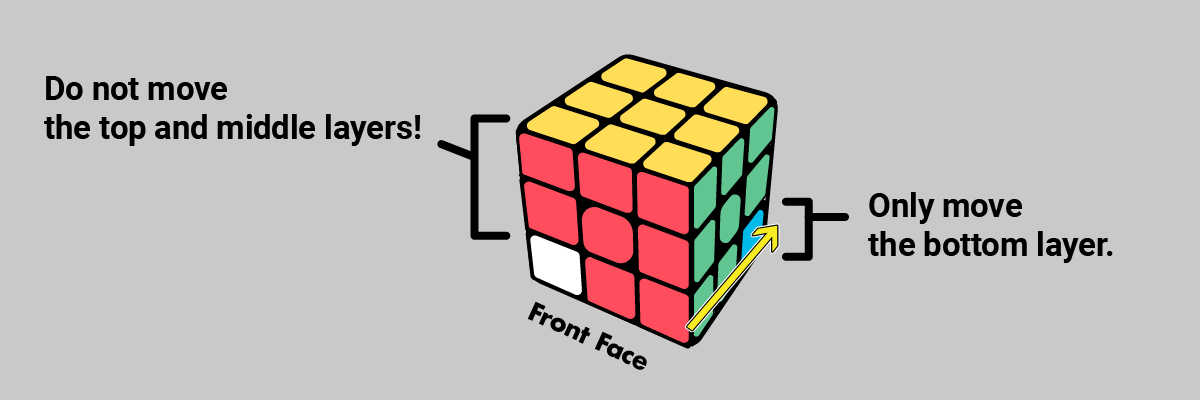
In Step 6, we only move the bottom layer without moving the top and middle layers. You will flip the cube and work on solving the bottom layer. First, let’s solve the white face on the bottom. (At this point, the side colors won’t match yet, but don’t worry, we will solve them step by step.)
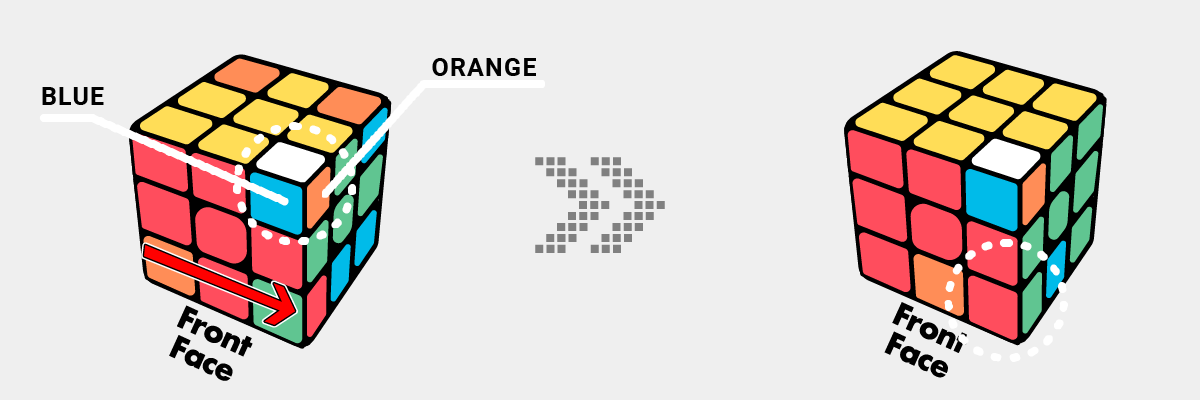
First, find a white piece on the side and perform a right turn to move the white piece to the bottom.

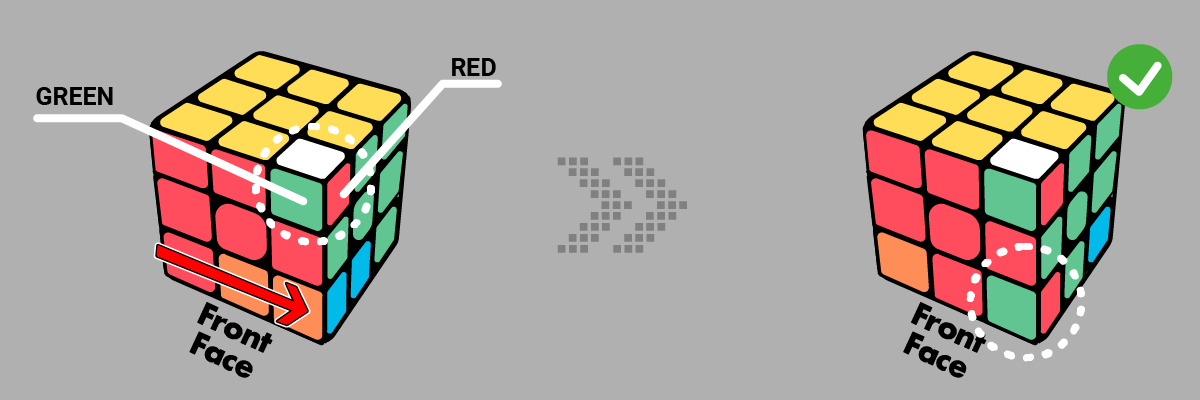
Find the cube with a white piece, move it to the bottom-right position by rotating the bottom layer, and perform an R turn.
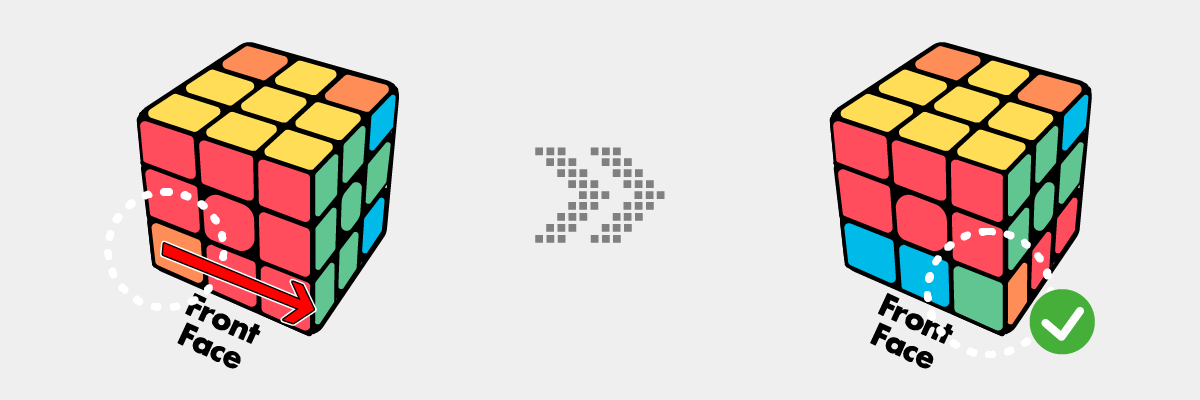
Keep doing R turns until the entire bottom layer is white.

This is what it looks like after flipping the cube!
Is the bottom face solved? It’s okay if the side faces are not aligned.
If you have completed this step, let’s move on to the next one.
3 Align the side faces of the four corners of the bottom layer
Here, we will completely solve the bottom face. Currently, you should have the bottom face solved, but the side faces of the four corners are not yet aligned.
It should look like this.
Now, we will align the side faces by matching them with the center color of the bottom layer. Of course, we don’t touch the middle layer or top layer! (That means we don’t use them as the reference points. If they move, don’t worry!)

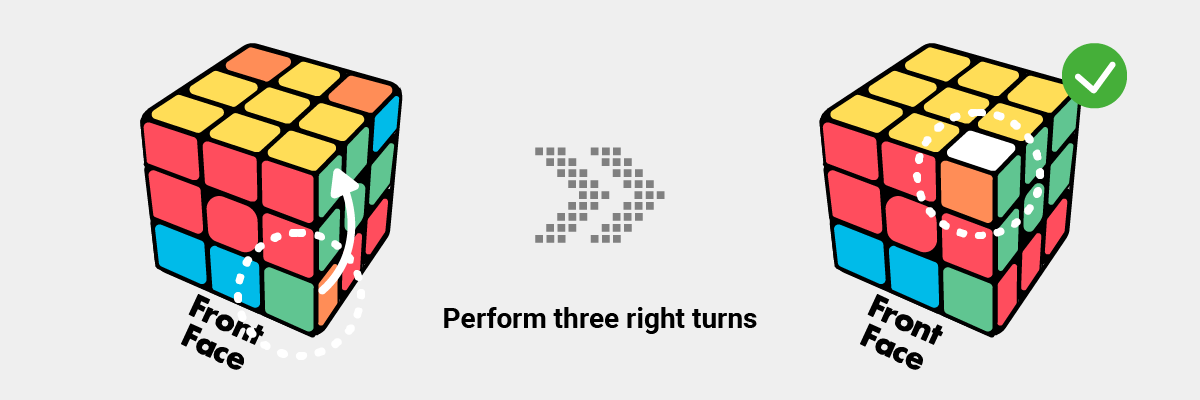
Perform right turn three times.
This will move the cube that was in the bottom-right position to the top-right, with the white face now facing up.
It should look like this. Then, rotate only the bottom layer to align it with the center color of the bottom face.

Now the side color and the center color of the bottom face are aligned. Repeat this process.
Once done, you’ve completed it! Great job!

Video Time!
This part might get a little confusing, so I made a video! Check it out and see if it helps you get the idea.
【Step 6】Super Easy Way to Solve the Rubik's Cube | Solving the Top Layer
But don’t worry, there’s more explanation coming up!
The next cube is now in the top-right position.
Check the side colors and align them with the center colors of the bottom layer. For example, if the side colors of the top-right cube are red and green, the center colors of the bottom layer should also be red and green.

Then, perform a right turn three times again to bring the top-right cube back down. Now, the red and green pieces are aligned!
Slide the unsolved cube in the bottom layer to the bottom-right position. This time, it’s green and orange.
Now, perform three right turns again to bring the cube with the white face in the bottom-right position up to the top.
Like this. Repeat it three times.

The green, orange, and white piece is now in the top-right position.
Slide the bottom layer again to match the green and orange with the center pieces.

Then, perform three right turns. It fits perfectly.
Alright! Last one—red and blue! Slide the bottom layer again to match the red and blue with the center pieces.

Now, perform three right turns again…

Once the bottom and top two layers are solved, you’re done!!
Phew, great job!

So, how does it look? Is it fully solved? Congratulations!! Enjoy your CUBE journey!
Check with the video!
Here’s a lucky pattern I captured on video! Sometimes, you can skip a step like this and save time—pretty neat, right?
【Lucky Pattern for Step 6】Super Easy Way to Solve the Rubik's Cube | Solving the Top Layer
That’s it for now.
What’s Next?
Nice work — you can now solve the cube using the beginner method 🎉
Next, you can learn the full 3×3 tutorial (with all steps organized, plus extra tips and algorithms).
Or jump to another guide: