All 41 F2L Cases (CFOP Algorithm Index)
F2L (First Two Layers) is the step performed after completing the cross, where you pair the corner and edge pieces and place them into their correct slots.
By mastering F2L, you can significantly improve your solving efficiency and reduce your overall solve time.

F2L 01
A fully connected pair. Align with U, then slide it straight into the front-right slot.
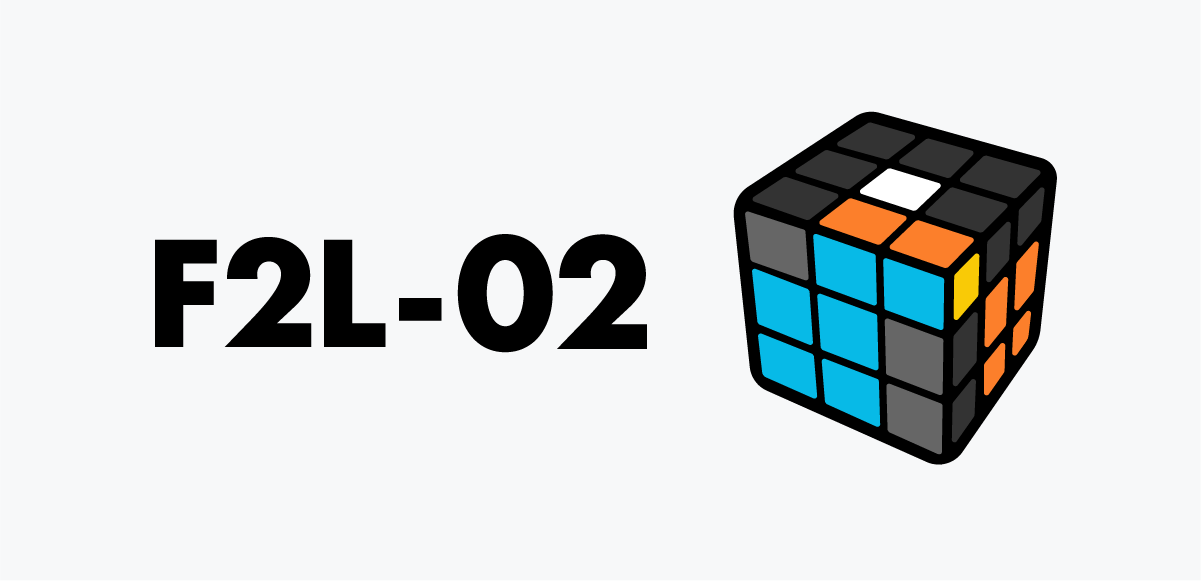
F2L 02
A nearly assembled pair. Only the edge orientation is off—fix it with U, then place it into the front-right slot.
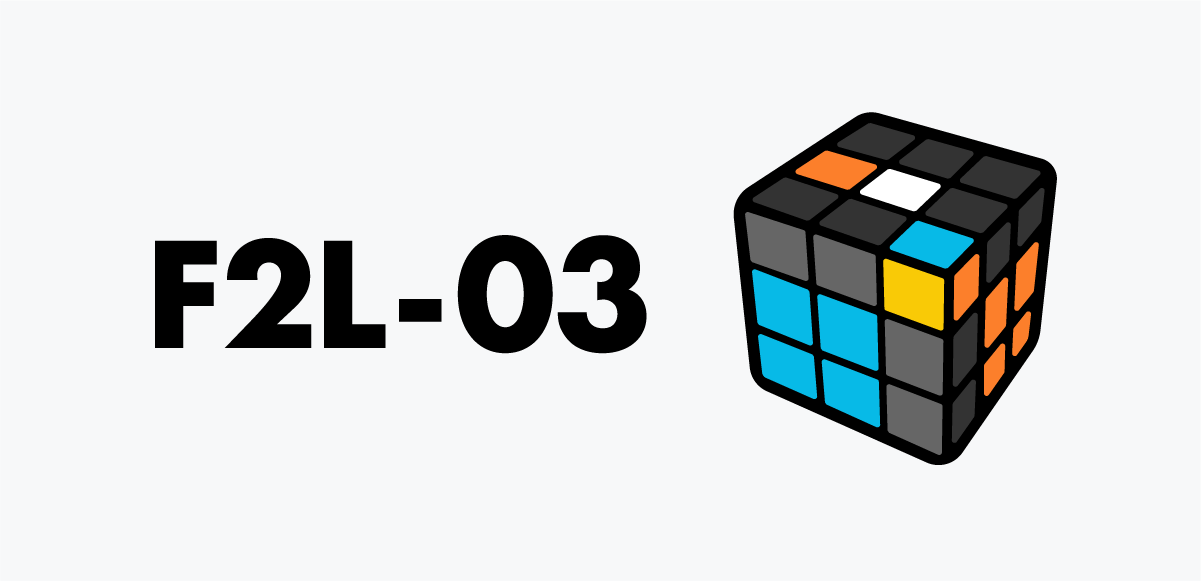
F2L 03
Edge on the left, corner on URF. Use F to bring them together, form the pair, and drop it into the slot.
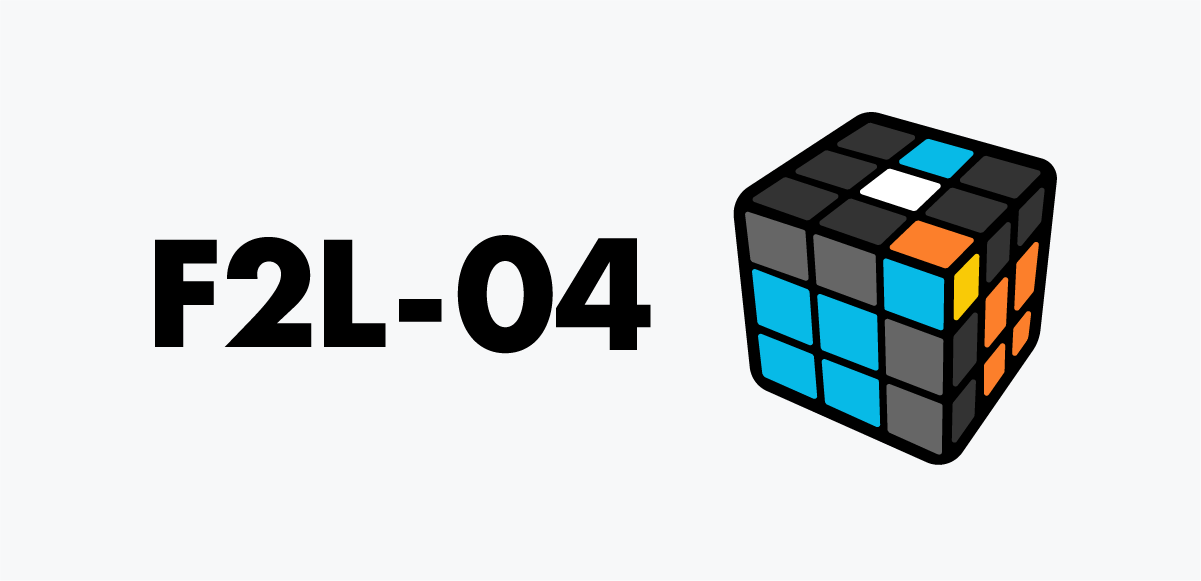
F2L 04
The corner is already near its correct spot while the edge rests on the front. Line them up, pair them, and place them into the front-right slot.
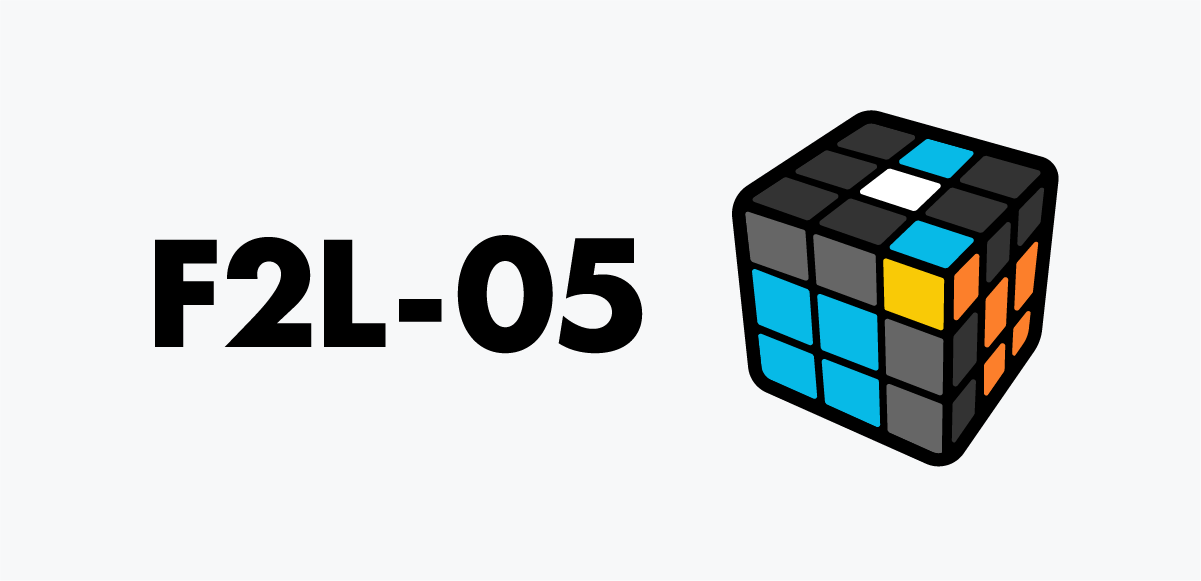
F2L 05
The corner is twisted and the edge is in the back. Move the corner away first, then handle it like a regular pairing case.
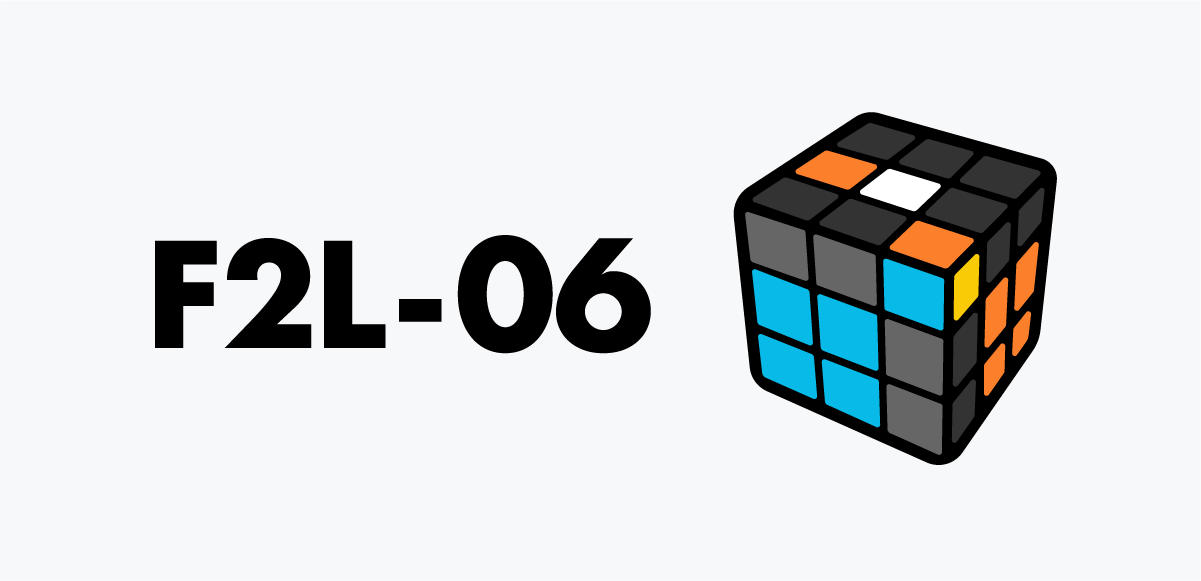
F2L 06
Bring the yellow sticker to front-left with U, hide the corner with F, shift the edge with U’, then restore with F to create a clean pairing position.
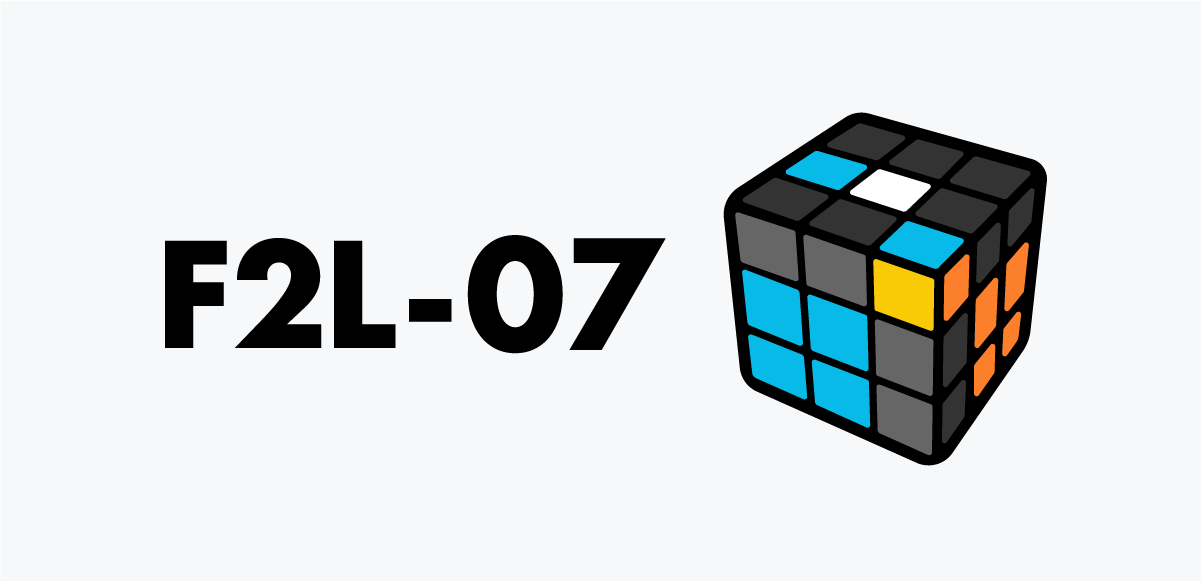
F2L 07
Move the corner from front-right to back-right, keeping yellow outward. Reposition the edge, bring the corner back, and finish the slot-in.
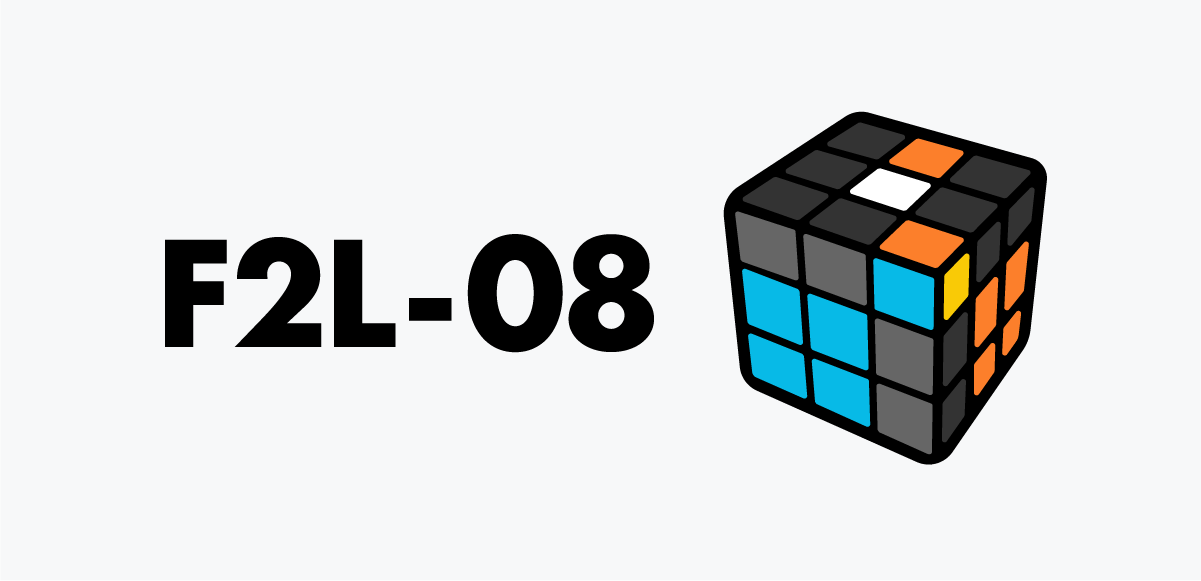
F2L 08
Rotate the corner so yellow faces front-left. Hide it with F’, bring the edge beside it, then restore with F to form the pair.
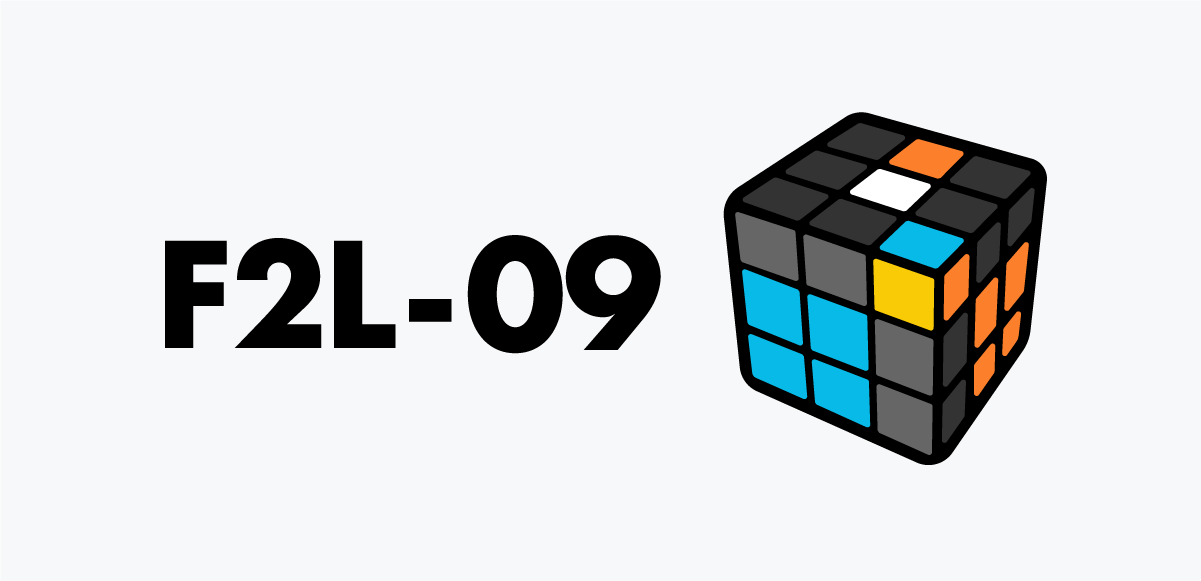
F2L 09
Turn the corner’s yellow to the back-right, drop it with R, bring the edge forward, restore, then fold with F' to pair them.
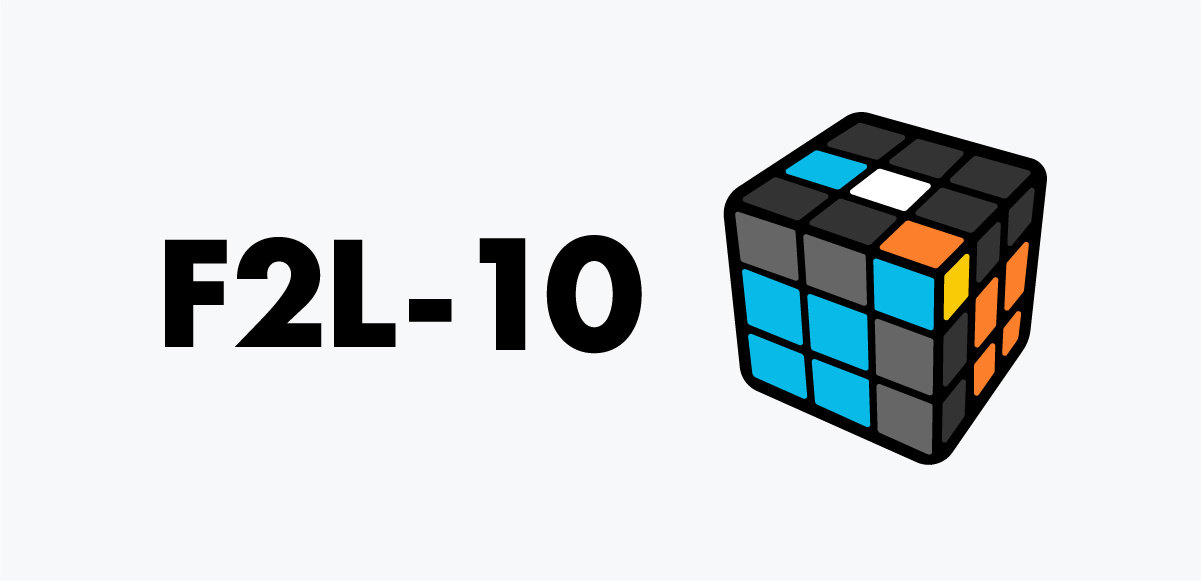
F2L 10
Move the corner’s yellow to the front-left. Separate them with F’, reposition the edge to the opposite side, then fold them together.
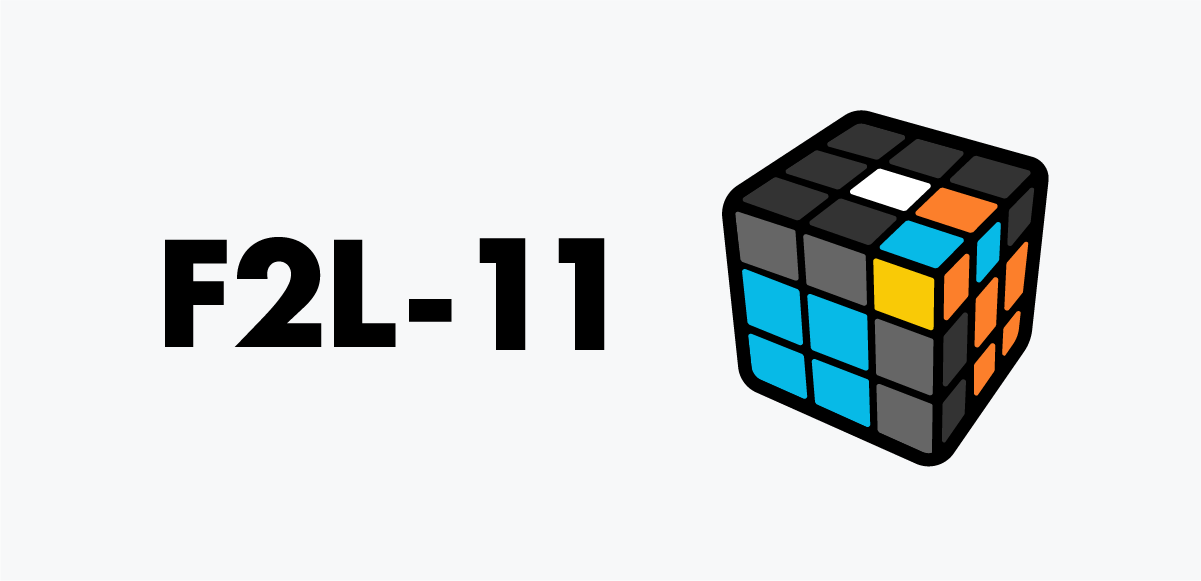
F2L 11
The pieces are touching but mismatched. Separate them first, then place the edge where you can pair easily.

F2L 12
Another mismatched-but-touching case. Move the corner away, slide the edge into place, then fold them together.
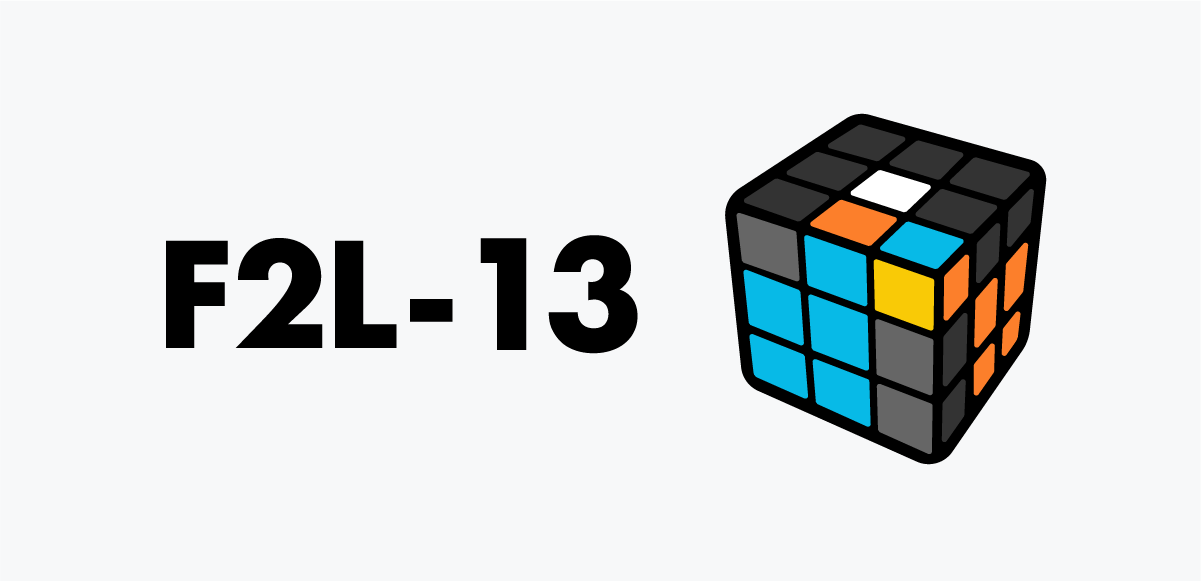
F2L 13
Corner and edge are touching but misaligned. Hide the corner with F’, move the edge, then fold them together at the right moment.
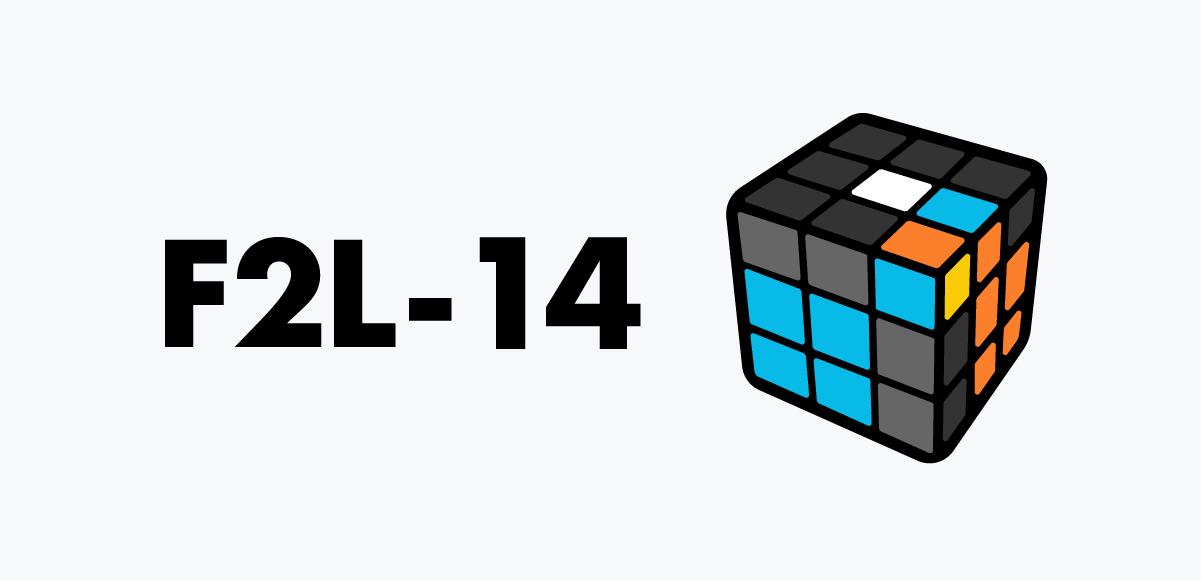
F2L 14
Corner is twisted on top, edge buried in the right layer. Extract the edge first, then form the pair.

F2L 15
Corner and edge are attached but don't match—split them apart first, then everything becomes simple.
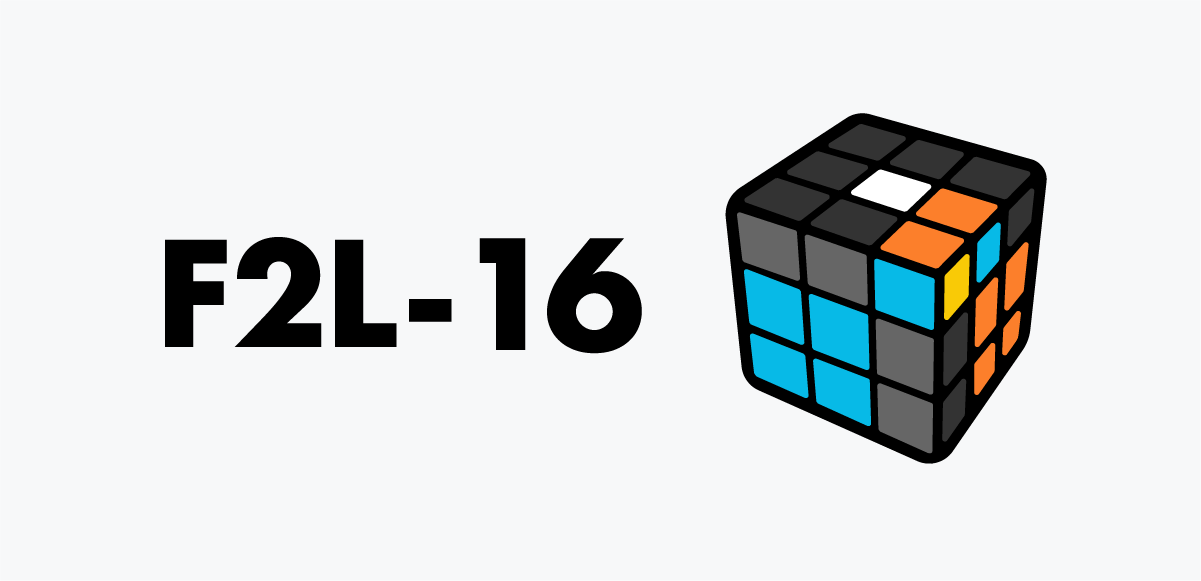
F2L 16
They pass by each other—separate them first. Move the corner away, slide the edge, restore, then fold them together once yellow is in front-right.
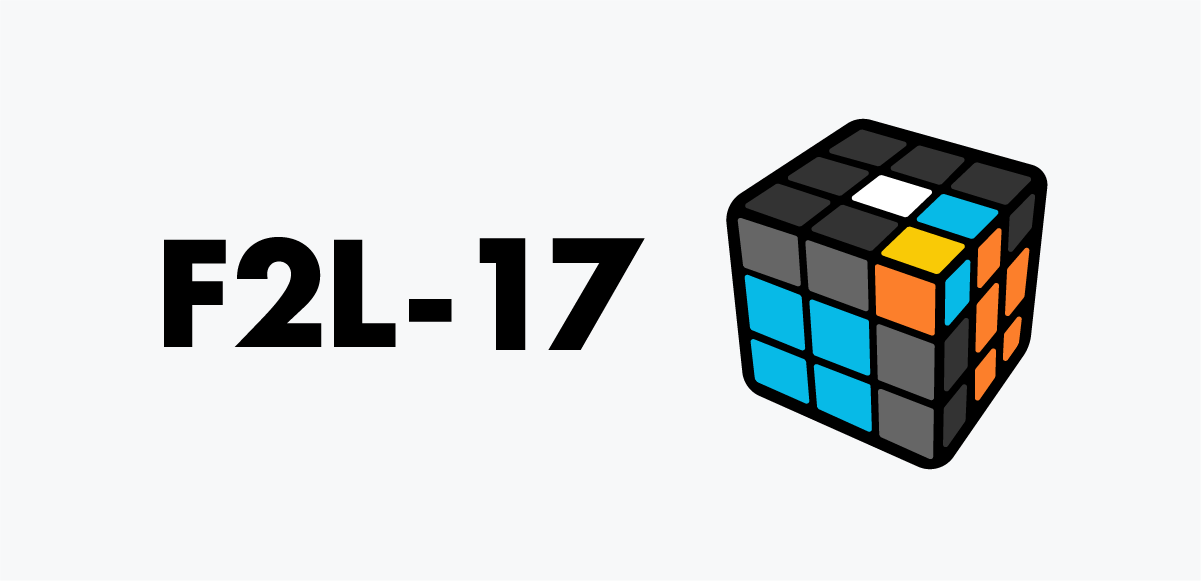
F2L 17
Corner faces upward and the colors don't match. Move the corner away with R, shift with U2, reposition, and fold them together for a clean slot-in.
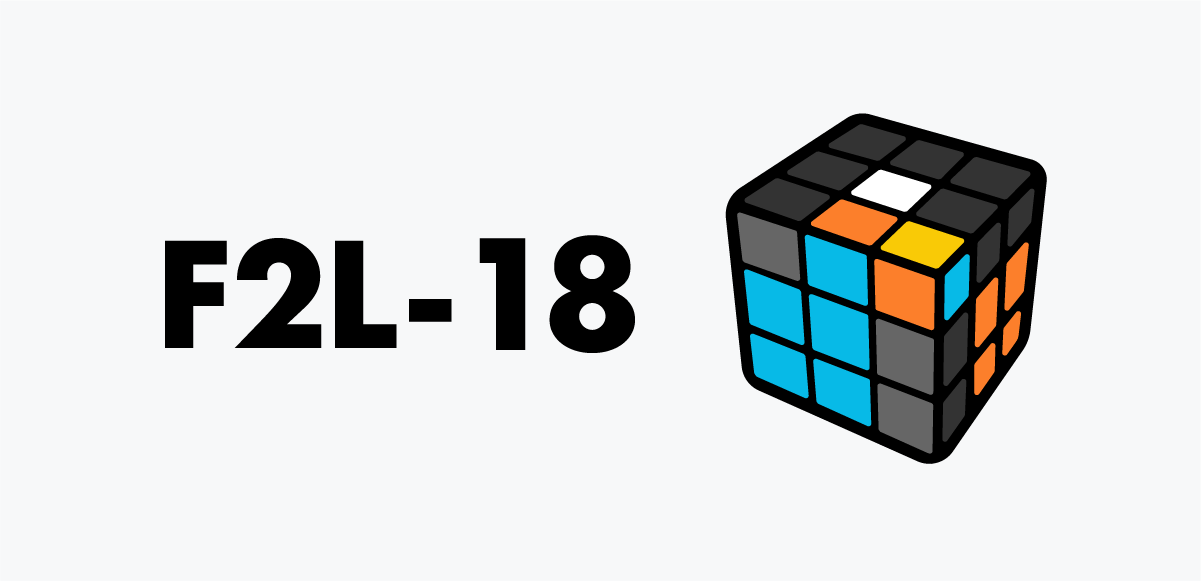
F2L 18
Corner is twisted up and the front edge doesn't match. Hide with F’, separate, restore, bring yellow to front-right, then fold them together.
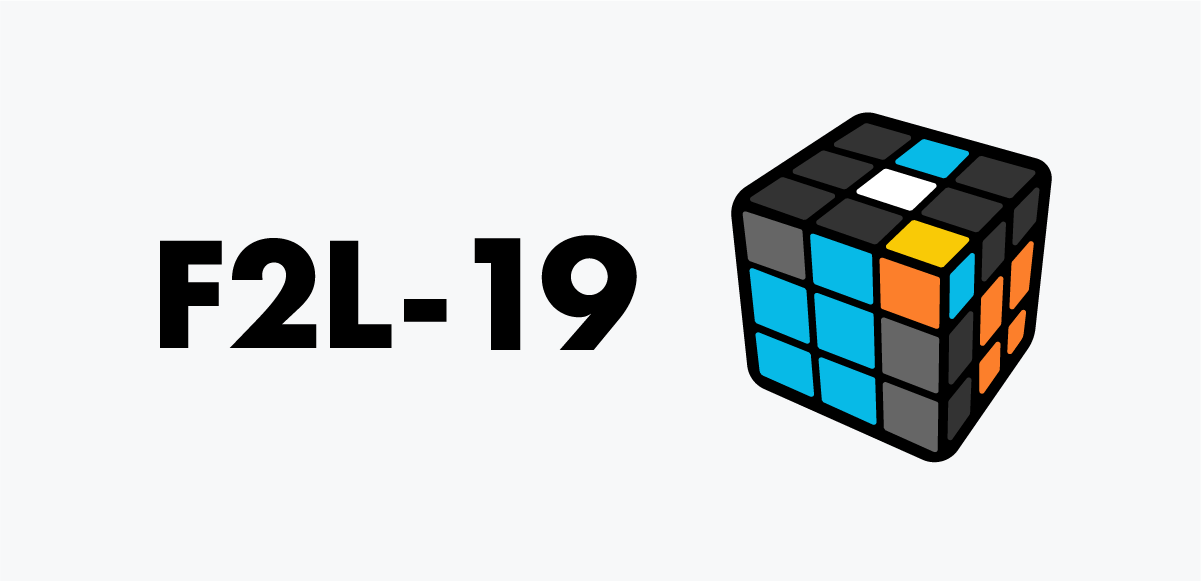
F2L 19
Corner is ready but the edge is too far. Bring yellow to upper-left, free the edge, then move the corner toward it for a smooth slot-in.

F2L 20
Move the corner to back-right, extract the edge with F’, bring them together, and finish the slot-in.
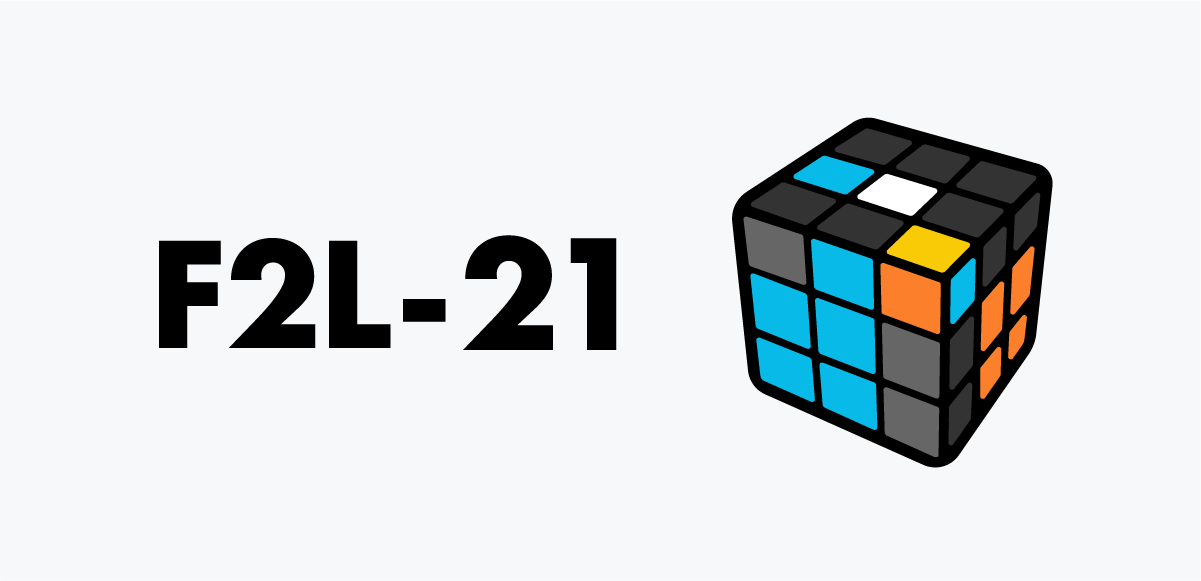
F2L 21
Move the corner to back-left, shift the edge to back-right, bring them together, and drop them into the slot.
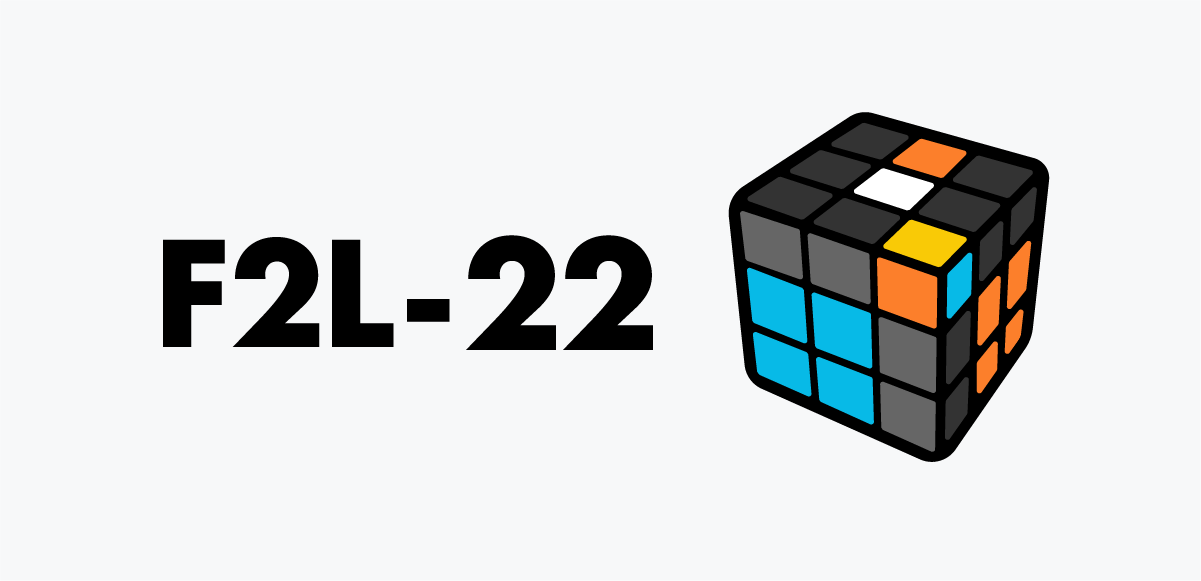
F2L 22
When the corner is on top and the edge matches the front color, align the front and use F' to free the edge. Move the corner into position and they instantly pair. Then insert.
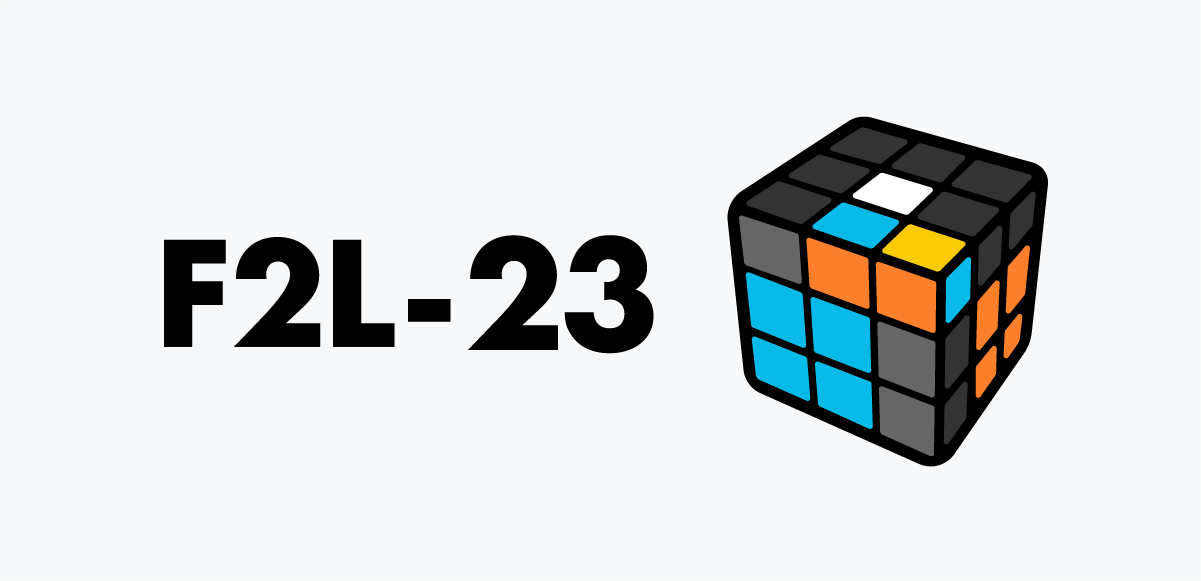
F2L 23
Swap the corner and edge positions. Drop the corner into the right-bottom slot, bring the edge to the top-right, let them meet in the back-right position, then insert the pair.
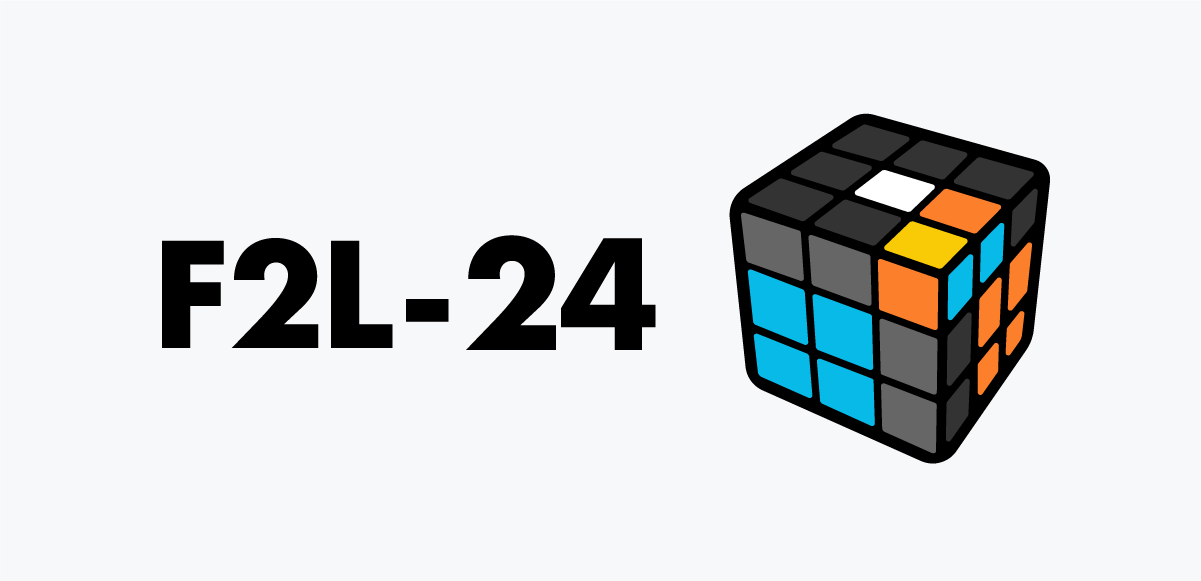
F2L 24
Reverse the order of the corner and edge. Use F to move the corner away, slide the edge over, restore the corner, and the pair forms. Insert immediately.
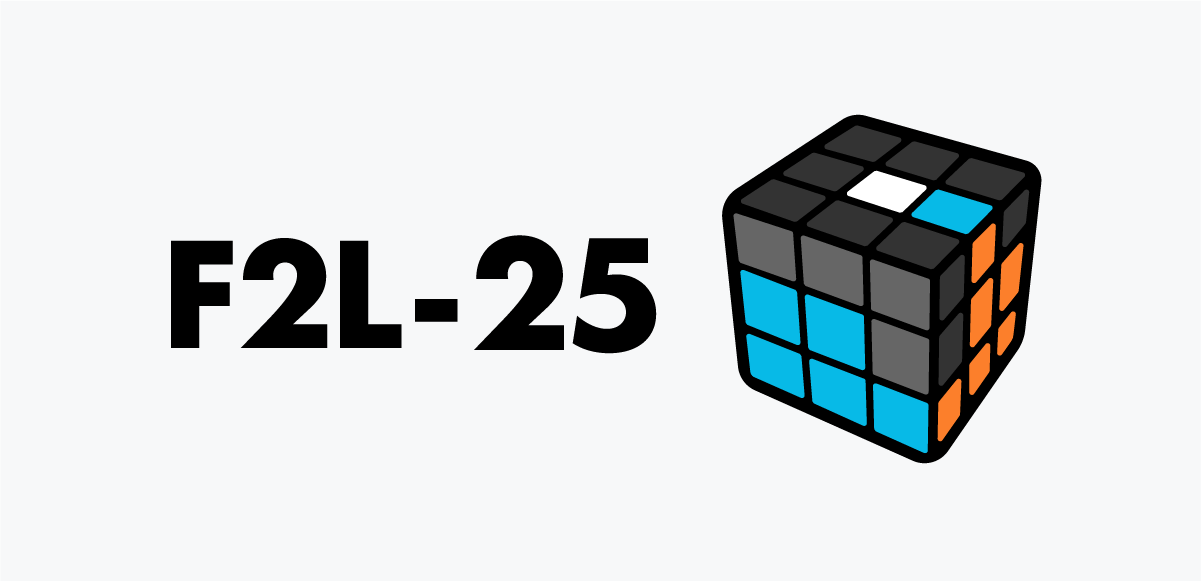
F2L 25
The corner is already inserted. Match the edge with the front color and insert with a simple left-side setup.
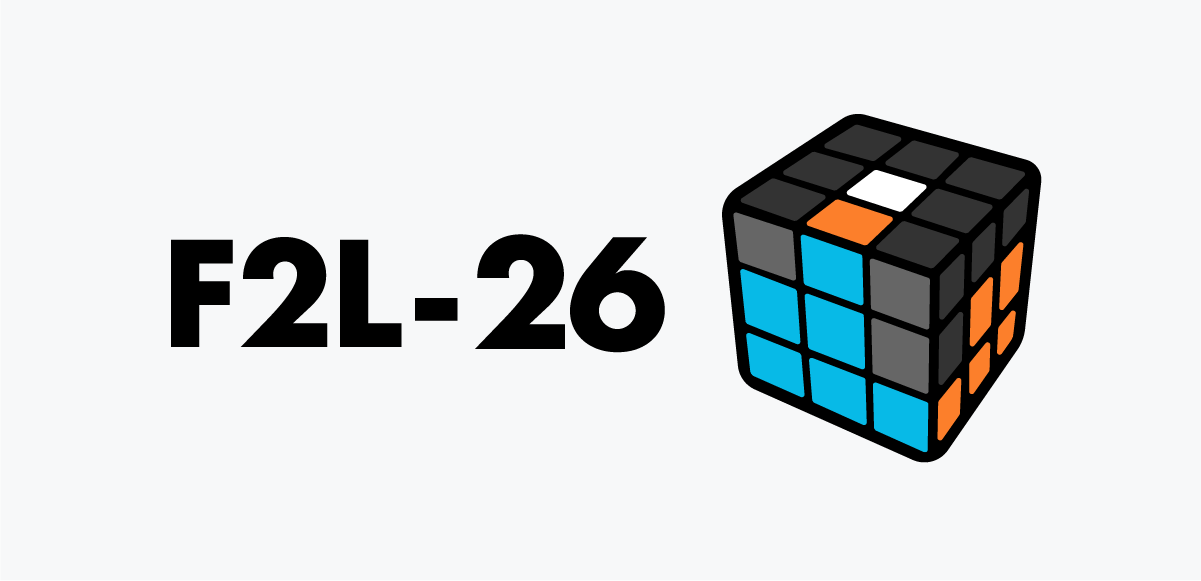
F2L 26
The corner is already in place. Rotate the right side to position the edge and insert smoothly.
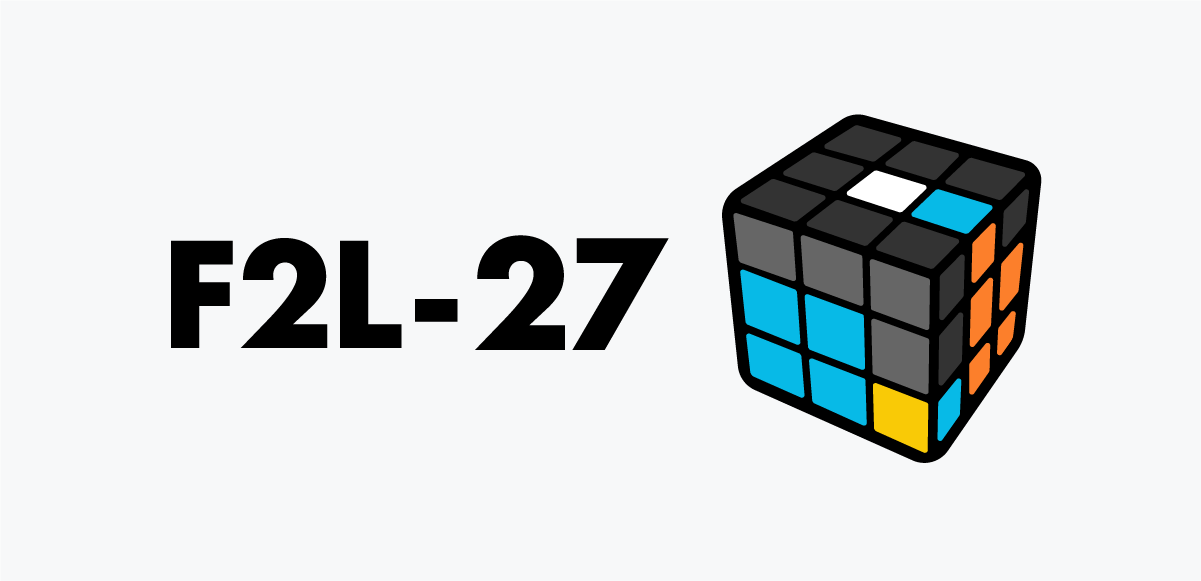
F2L 27
The corner is inserted but oriented incorrectly. Bring it out to the top—sometimes the pair forms immediately. Insert once they match.
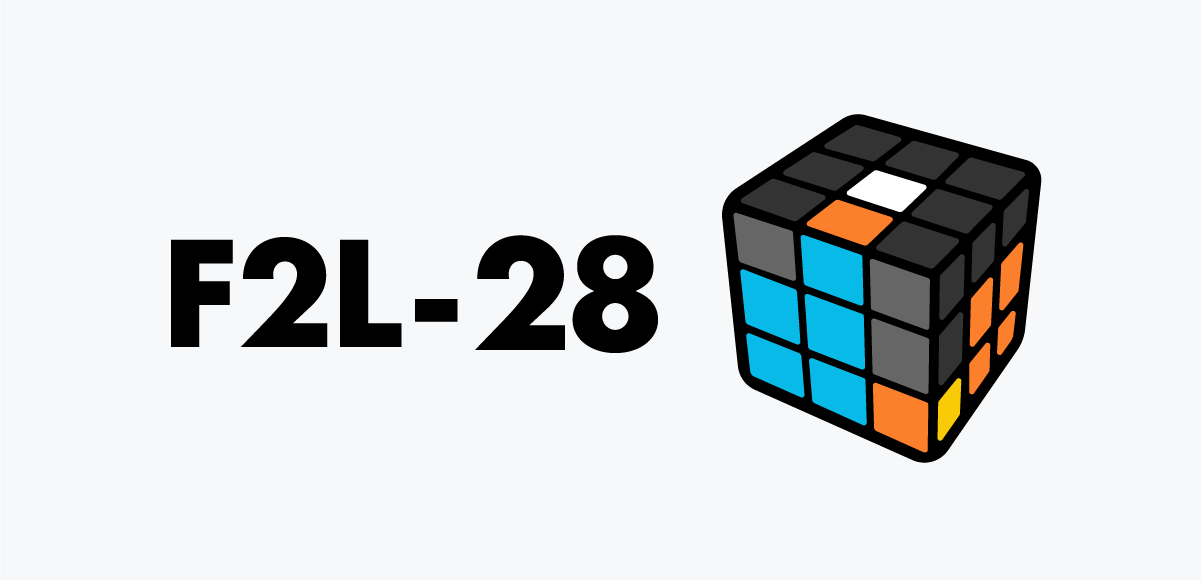
F2L 28
The corner is inserted but misoriented. Pull it out to the top—often the pair aligns right away. Then insert cleanly.
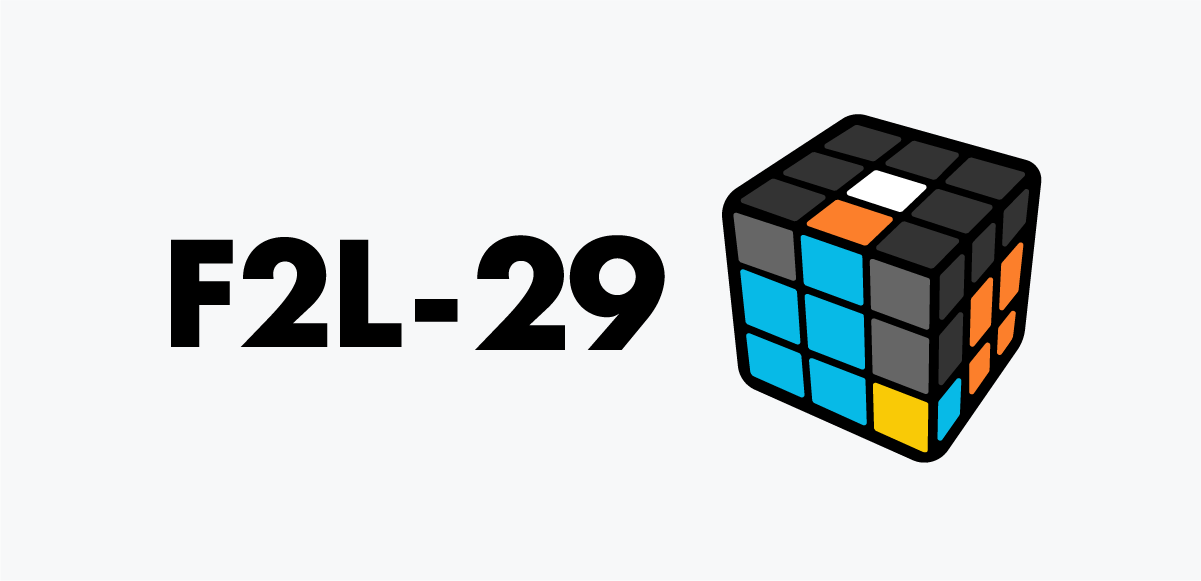
F2L 29
The corner is inserted but misoriented, and bringing it to the top won’t pair it. Move it to the back through the bottom using an F move to set up a workable position.

F2L 30
The corner is inserted but oriented wrong. Bring it out to the top, then rotate it to the far side and insert the pair smoothly.
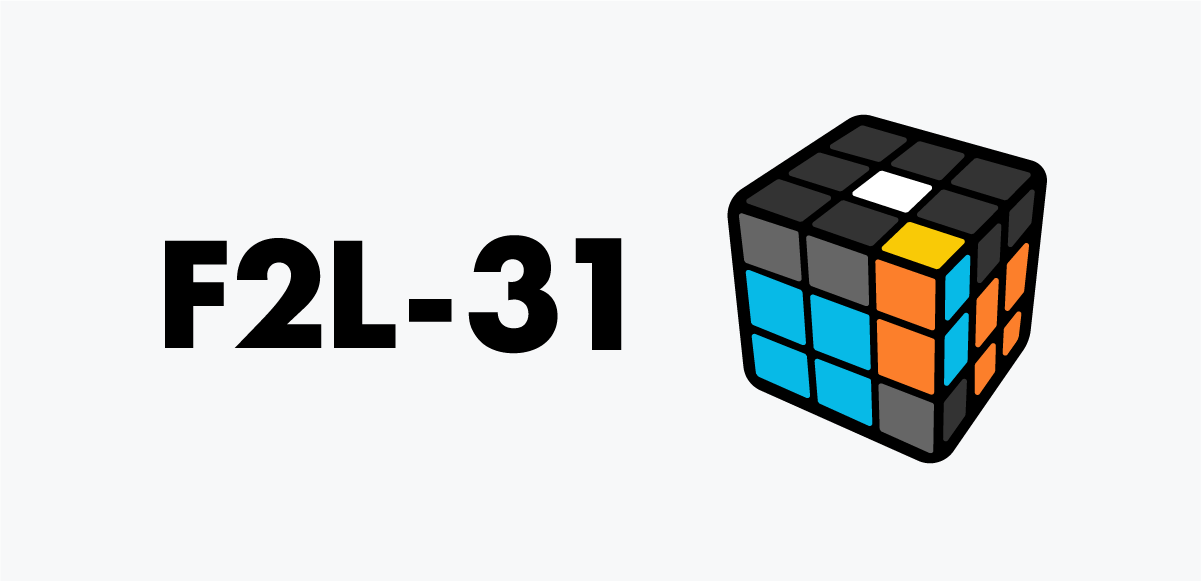
F2L 31
The pieces are almost paired. Bring them out to the top layer first, then insert for an easy solution.
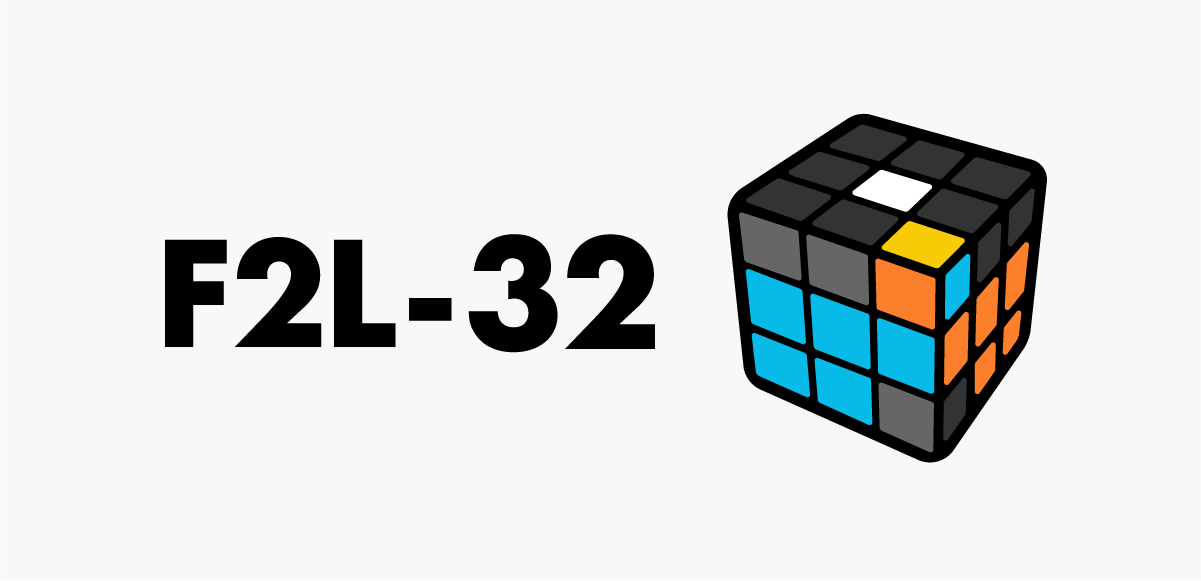
F2L 32
A lucky case — a quick R move and the pair falls right into the slot.

F2L 33
Just move the corner to the back-right, align with the edge, and drop it into the slot.
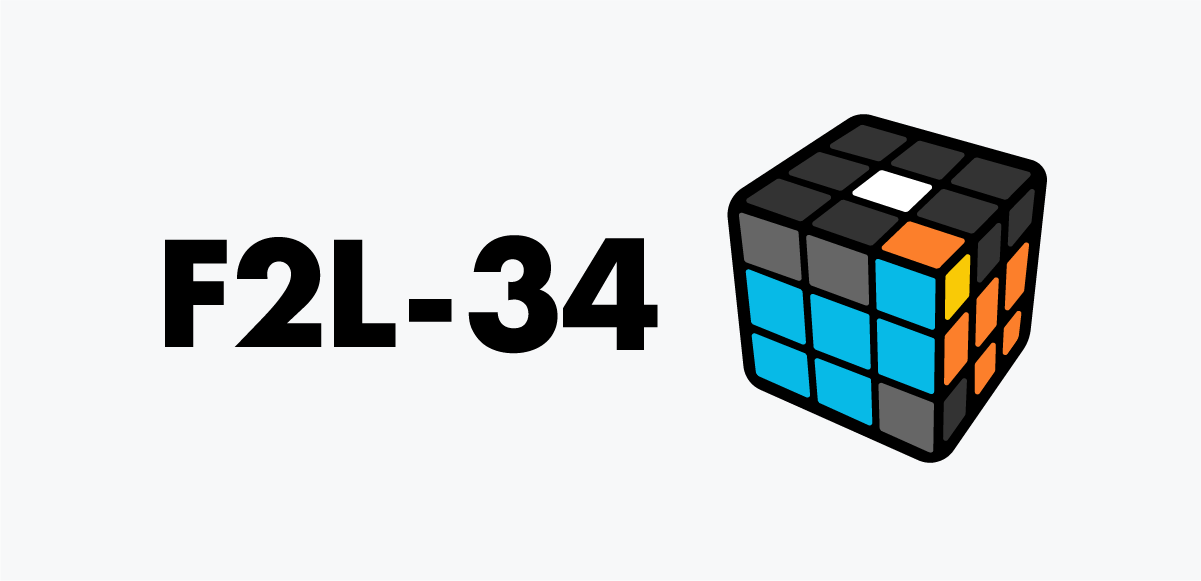
F2L 34
They’re twisted apart. Separate with U R, position corner front-right and edge in the back, then R to pair and slot them in.
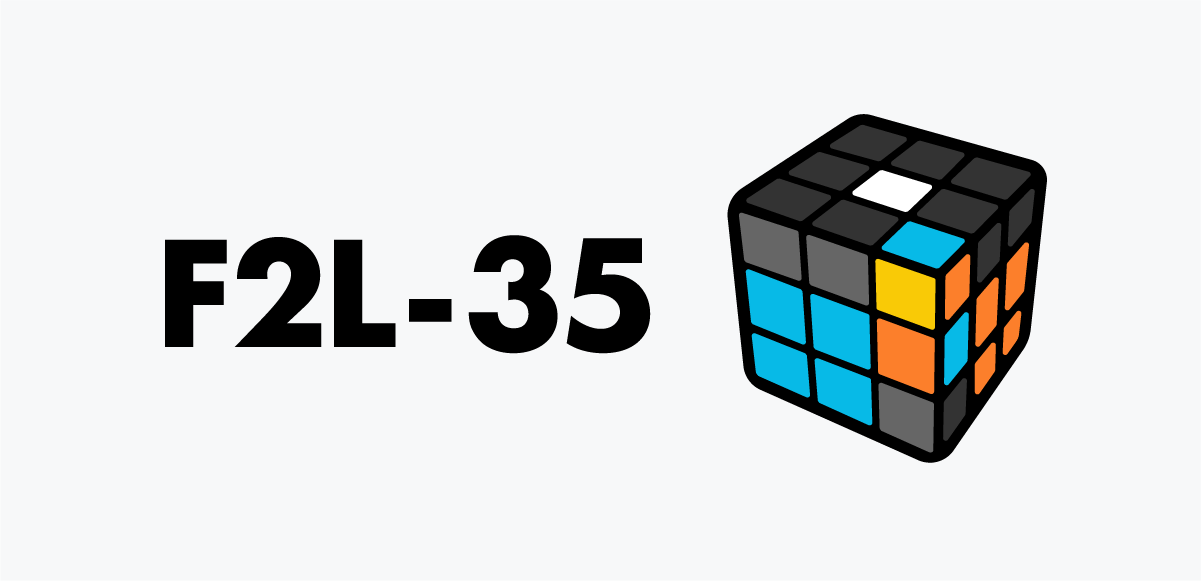
F2L 35
Bring the corner to the back-right with U', lift the edge out, set the corner front-right, and use F' to form the pair.
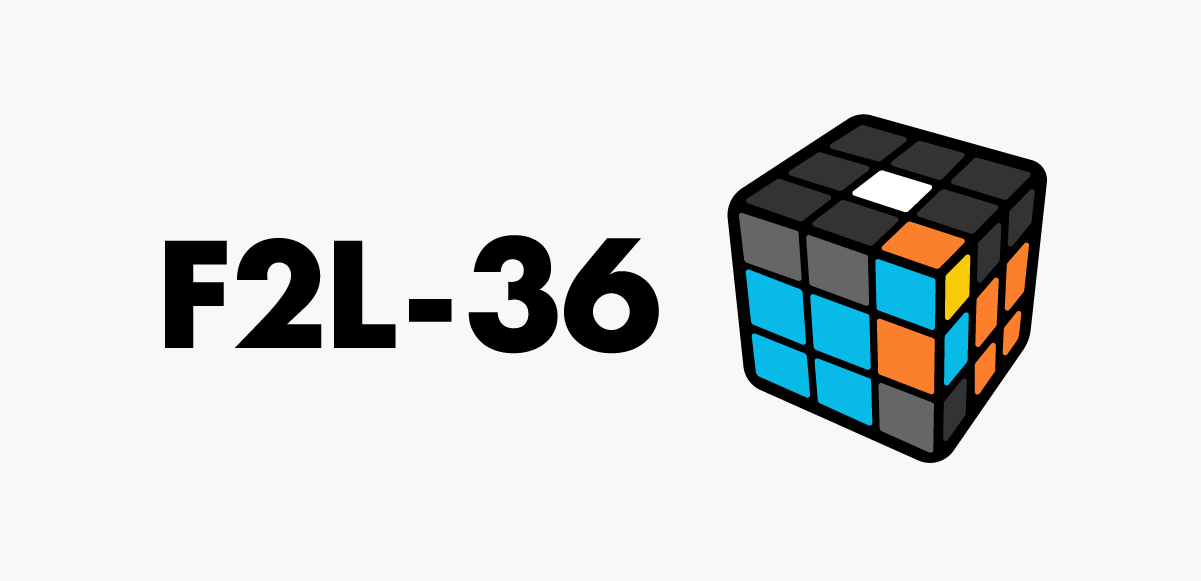
F2L 36
The corner and edge are twisted together. Use U F' to separate them, then the pair forms instantly and can be inserted normally.
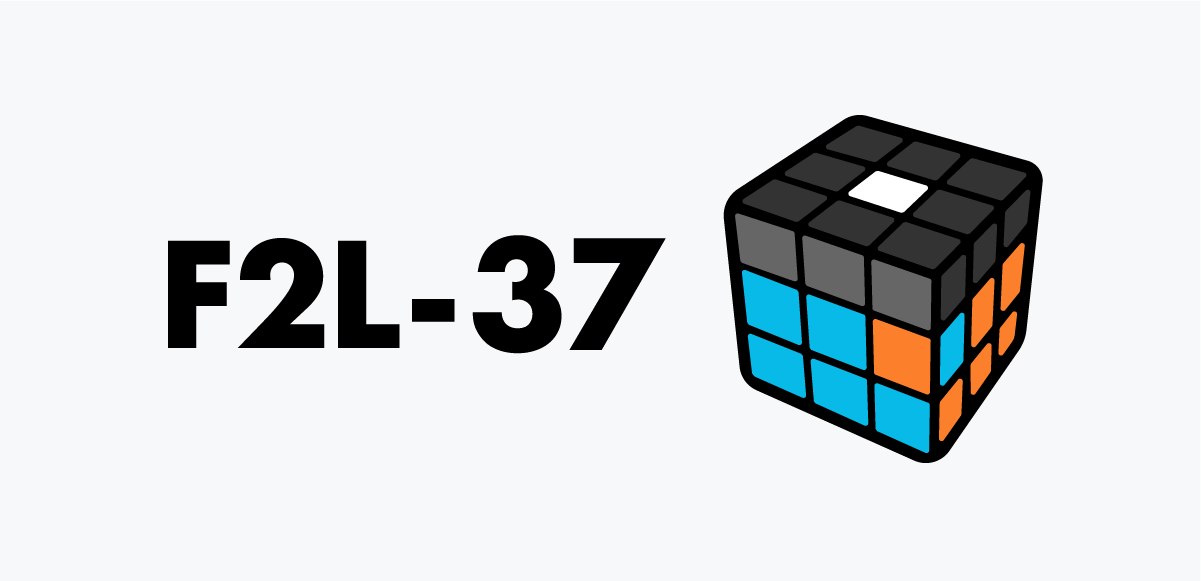
F2L 37
Both pieces are in the slot but mismatched. Bring the corner out, separate them, and reposition. After the reset, they naturally form a clean pair ready for insertion.
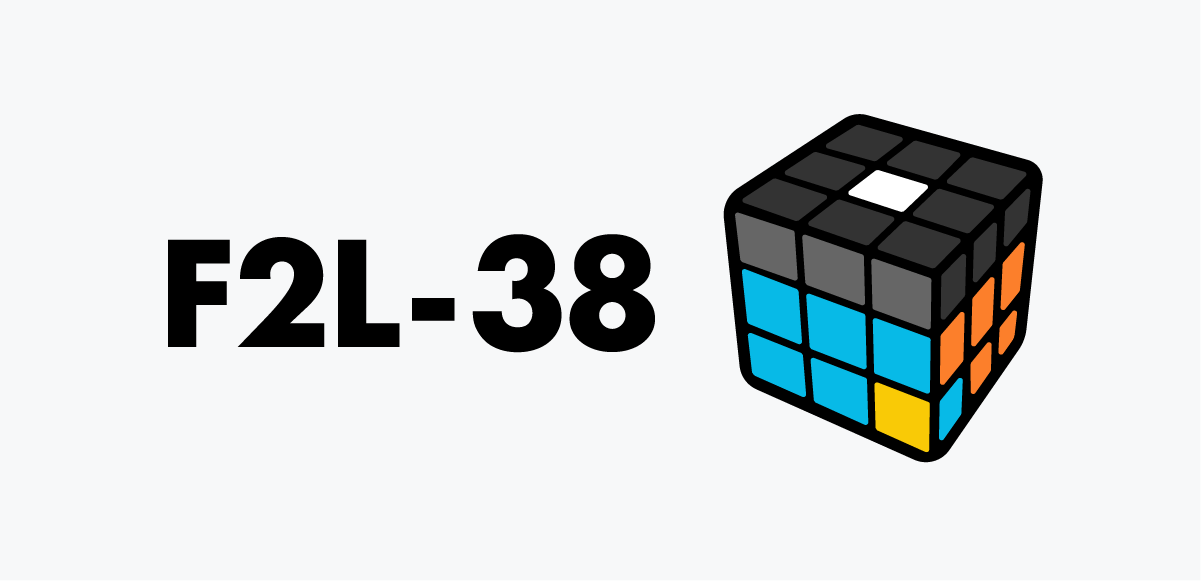
F2L 38
Separate the pair with R U'. Move the corner to the back-right and bring the edge closer—this sets up an easy, clean insertion.
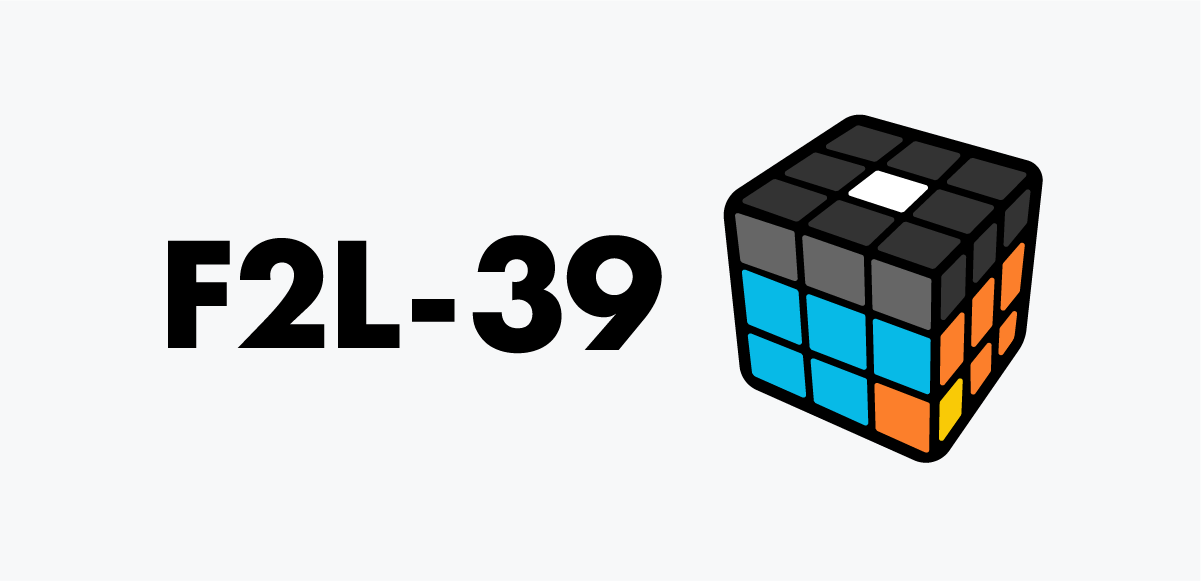
F2L 39
The pieces are stuck together but misaligned. Separate them, tuck the edge into the back-right, then bring the corner over to form the pair.

F2L 40
Separate the pieces, face them toward each other, then use R to pair and insert smoothly.
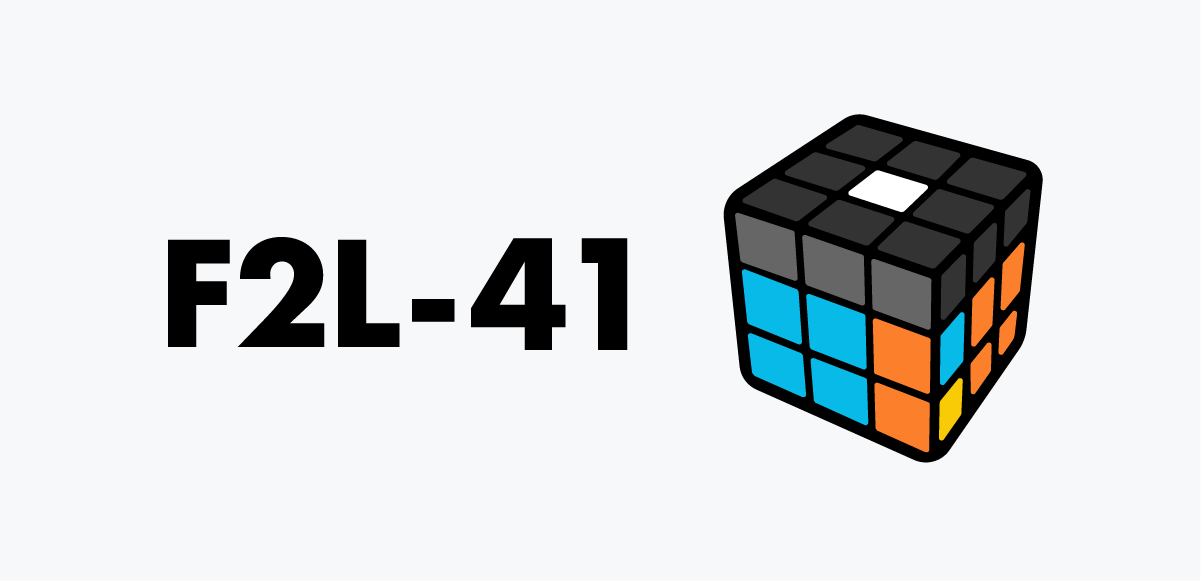
F2L 41
A tangled case. Use F to swap the corner and edge positions—this fixes their order and creates a clean pair for insertion.
Related guides


More tutorials: 3×3 hub · Beginner solve · Notation · OLL hub · PLL hub